
Essential Tools for Building a Van
Essential Tools for Building a Van

Updated March 2, 2024
The only relevant tools we owned when we began our self-built Sprinter camper van were a corded circular saw, a miter saw, a cordless drill, and a jigsaw. By the time our van build was completed we owned a lot more tools, some of which were necessary and some not. This article highlights what we believe are the Essential Tools for Building a Van.
Note: This site contains affiliate links for which I may be compensated.

Cutting Van Sheetmetal – Windows and Fans
Our first two projects on the van included the installation of a vented window and a Maxxair Fan. Both projects involved the scary process of cutting vehicle sheetmetal. Begin the process with use of a cordless drill. Add pilot holes to give the jigsaw a place to get started. We have had great service from our Ridgid Lithium-ion drill and impact driver set. (The impact is particularly nice for setting Plusnuts.) We’ve had a basic high-quality Bosch jigsaw for 10+ years now and would recommend it to others. The Bosch JS260 is the modern equivalent of what we have used throughout this entire build.
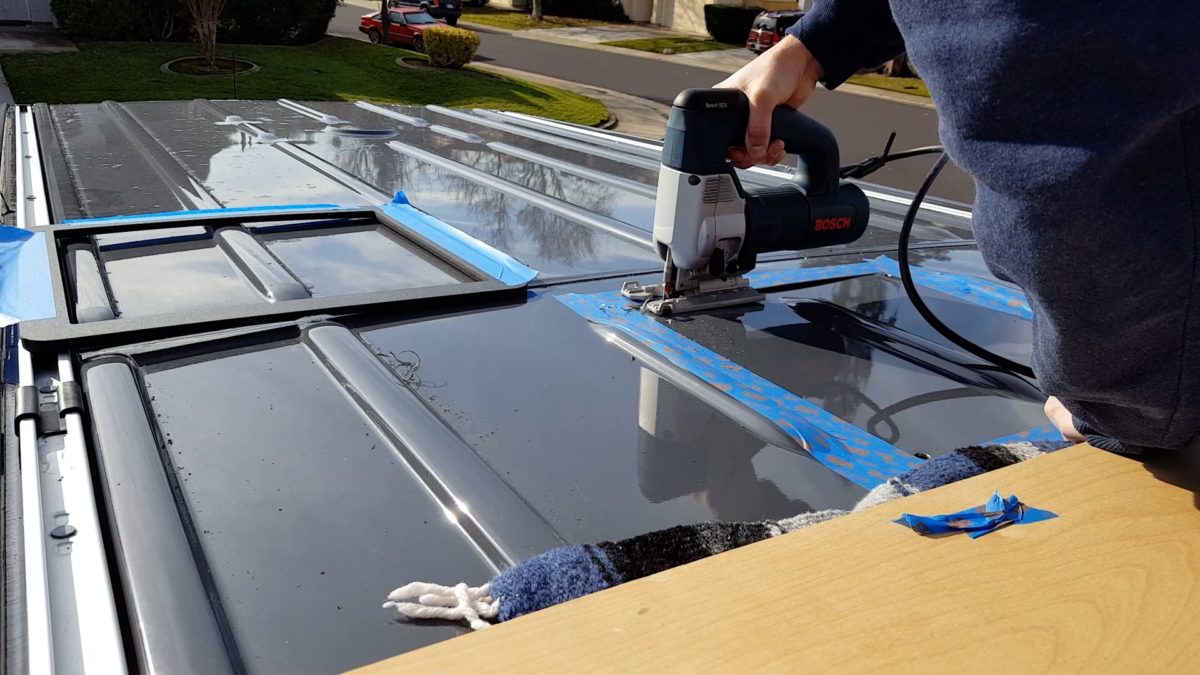
Jigsaw Doing its Thing
In addition to cutting sheetmetal, the jigsaw has been used extensively to cut rounded edges in wood. Some examples include the overhead cab shelf and cabinet endcaps. The van basically has no straight walls, so curves have been cut into virtually every piece of cabinetry. For cutting sheetmetal, use these fine-tooth jigsaw blades, or get this multi-pack with blades for wood and metal.
Tools for Insulating
Insulating your van requires only the most basic of tools. If using an adhesive-backed butyl sound dampener you need only an inexpensive roller to adhere the butyl mat to the wall. We highly recommend using Thinsulate as your main insulation, as it is rated for use in automobiles and boats, is water-resistant, flame resistant and generally a great material (the BEST in our opinion) for insulating a van. To apply you need only a good pair of scissors. We’ve tried several brands and these are the only ones that cut the Thinsulate easily and repeatedly. In order to get insulation in tight spaces such as the overhead ribs, we used a steel fish tape to fish the insulation through. Other than that, you only need the 3M-90 glue to adhere the Thinsulate.
Tools for Electrical Wiring
With windows and fans cut and the van insulated it’s time to turn our attention toward the electrical system. Beyond basic screwdrivers and such, you will want these self-adjusting wire strippers to quickly and easily cut and strip wire. We wish we would have known about these 15 years ago. You will want to crimp electrical terminal lugs on to the ends of your wire to provide a solid electrical connection. Use this tool for smaller gauge wire and this bad boy for battery and inverter cables.
Tools for Building Cabinetry
Track Saw
Cabinetry is where the more expensive tools come in to play. If you’re building high-quality cabinets that have either inset doors or very fine tolerances, a table saw with a sled would be ideal. However very few of us are going to make a $2,500+ commitment. (Including us!) We tried to make a fence for our circular saw to cut straight cabinetry lines, but the precision was not high enough. We think the best bang-for-the-buck here would be a track saw. (If you prefer Milwaukee over Makita, this is the one to get.) It offers a much higher level of precision than a circular saw, but without the extreme cost and large physical size of the table saw. We regret not buying one of these and wouldn’t build another van without it.

Don't be a Dummy, wear a mask!
Pocket Hole Jig and/or Biscuit Joiner
For those building cabinetry from wood, you will want either a pocket hole jig or a biscuit joiner. Both tools will allow you to build drawer boxes and make strong 90-degree connections. A biscuit-joined and screwed and glued connection can be very strong.
Miter Saw
If you’re building from 80/20 like we are, replace the above with a miter saw. This is one of those tools you’ll keep forever and use for far more than your build van. It will cut the 80/20 or anything else at any angle and can be beveled as well.
Router
We did not think we needed a router, until we did. We have used it to ease the edge of cabinetry, to flush-trim the edge of our laminate countertop and to flush-trim all the excess coincell material off our rear cabinetry.
Optional : Dress Press – for precision drilling
Other Miscellaneous Helpful Van-Building Tools
Quick Grip Clamps – general purpose
Drill Bit Stop collars – so you don’t drill through the side of your van
Trim Removal tools – for popping loose vehicle fasteners without breaking them
Step Bits – for drilling sheetmetal and wood in a clean fashion
Compass Scriber – for scribing corners of the van
Speed Square – for measuring and making square corners
Contour Gauge – for duplicating a complex profile
Torx Bit set – Mercedes-Benz uses Torx screws throughout the chassis
Conclusion
If you bought everything listed here (with the exception of the $2,500+ table saw) you would spend $1,000 on tools. This includes the relatively expensive track saw, but if you replace it with a basic circular saw you’ll be under $700. Some of the items on the list you probably already own and not all of them are 100% critical.
The purpose of this article was to let you know what tools we think are either helpful or critical in producing a high quality van build. It is not an exhaustive list of every tool we used in our build.
We also purchased a used bed jointer, which we have used infrequently and do not recommend. We did not use a biscuit-jointer nor a pocket hole jig because we framed all of our cabinets with 80/20 aluminum. The tools we used are mostly medium cost, medium quality tools to try and strike a balance between cost and quality. For tools that you seldom use you can replace them with a cheaper Chinese variety tool and for places where quality or long life matters you may consider an upgrade.
We make the assumption that you have a basic toolset that includes screwdrivers, some wrenches/sockets, a level, sandpaper block and a measuring tape or scale. This article would be remiss if it didn’t recommend use of eye and ear protection, a respirator for dust-producing work and good lighting while you work.
As always, take pride and enjoy your work!

OSHA-certified safety liaison
Help Us Help You
We offer all of our write-ups and instructional videos for free. A lot of time, effort and money goes into developing and maintaining this website. If you find the information on this website helpful, you may use our various links when you are ready to make purchases. As Amazon Associates we will make earnings from qualifying purchases, however it costs you nothing to use them. Alternatively you may consider using the donate button below to make a simple Paypal payment, or message us if you prefer Venmo. We sincerely appreciate your visit as well as your support.
Hi Ken
Did the trim removal tool set you recommend do everything you needed or were there some items that required a special tool not included here?
Thanks
Hi Dean, this set has worked well for me. I wouldn’t recommend it for dentistry work though. -Ken
Everything as clear and complete as in the YouTube videos.
After each explanation, not even a question arises: everything is already answered.
Everything is very helpful for building my own motorhome.
Great, thank you!
Hi Ken, I am starting my 2020 crew 4×4 144 build and wanted to say thank you for your thoughtful, innovative, and comprehensive website and youtube videos. My head is spinning with all the information that is available regarding DIY Sprinter builds. You have added clarity and purpose to an overwhelming space. I follow another sprinter DIY builder “Live like Pete” http://livelikepete.com/category/van-build/. You both are doing really cool builds and presenting the information in a digestible and useful manner. Continued success and maybe we’ll see you on the road one day. Cheers, Karl
Thank you Karl, I really appreciate the support and kind words! -Ken
Ken, you have become not only a go-to for us for so many projects for our Transit build, but a warm-hearted guide to add a ton of soul to our project. Thank you!
That makes my day, thank you so much! Keep in touch and let us know how it’s coming along. -Ken