Our Sprinter van gets treated to a complete detail and wax once a year to protect the exterior paint from the elements. As great as the paint looks, the once-black bumpers, plastic body trim and fender moldings have turned a dull gray color.
The plastic trim on modern vehicles is petroleum-based. Over time and through exposure by the sun’s UV rays, these oils degrade, causing the gray chalky-look we see on our trim panels. Much like waxing the paint, a protective coating must be applied to the plastic trims to maintain their appearance. In this article we will discuss how to restore and protect the plastic trim.
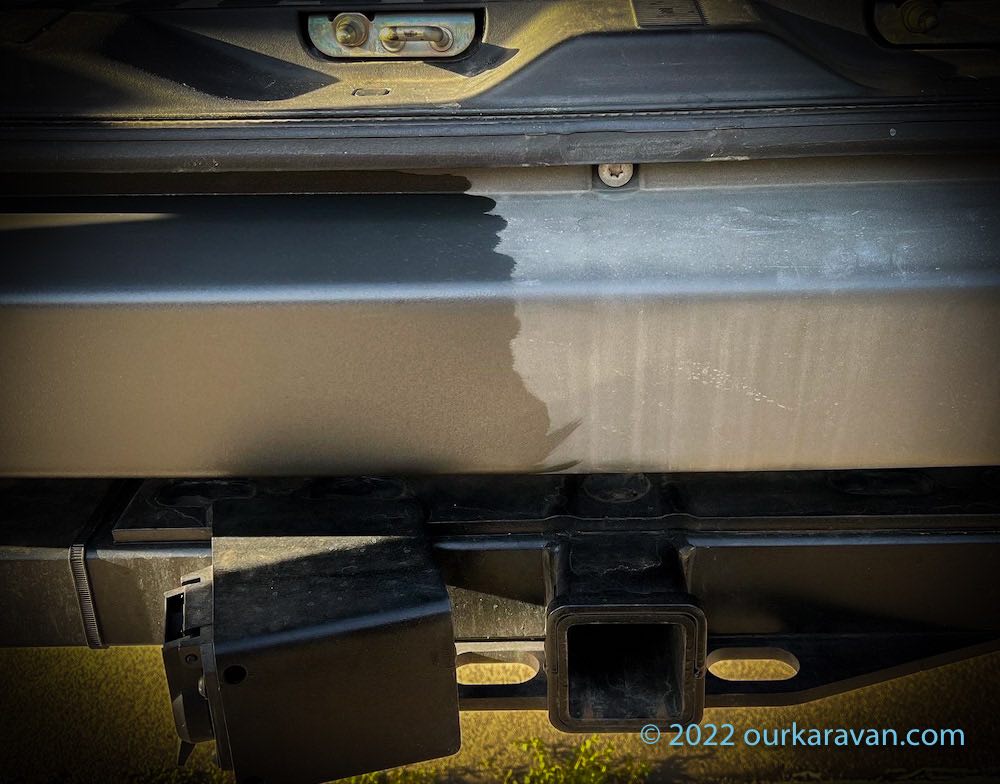
On the right (in the above photo) is a scene you are pretty familiar with–black plastic faded to gray. The right side had been washed, but soap and water alone were not enough to thoroughly clean the surface.
Note: This site contains affiliate links for which I may be compensated.
Choosing the Right Products
We are pretty diligent in attempting to maintain the plastic trims on our vehicles. Over the years we have tried 303 UV Protectant, Mother’s Back to Black, and Meguiar’s Ultimate Black, all with similar results. We suspect if you reapplied these at least monthly they might work. In our experience, the latter two products seemed greasy and provided short-term enhancement of the appearance of the plastic. However after a rain, the painted panels below the trim would be streaked with a grease-like substance. Washing the vehicle seemed to wipe the product off the surface.
303 is a good product and we firmly believe it provides adequate UV protection for the plastics if applied regularly. However once these panels have aged, we feel the product is incapable of restoring an already damaged panel. Our goal was to restore our already-damaged panels AND protect them from future damage.
The photo above illustrates the greasy-nature of the products above. Dirt and road debris attached to the treated surface like a magnet.
Finding the Holy Grail of Trim Restoration and Protection
The internet research rabbit hole begins. We settled on one product that a lot of professionals use, C4 Permanent Trim Restorer. In their words, “C4 Permanent Trim Restorer utilizes a covalent or chemical bond to become an extension of the plastic molecule it’s protecting. Not to be confused with much weaker electrostatic bonds used by, amongst others, ptfe based polymers, C4 swaps part of its molecular structure with the surface molecules of your car’s trim. You can expect up to 2 years durability from a single application.”
Ceramic coatings are known to be very long lasting. In order to protect our investment, we felt this product warranted a try. Let’s collect our products, get the surfaces prepped and get this party started.

Surface Preparation and Product Application
Follow all instructions provided by the manufacturer of the product. In order to achieve a solid bond between the product and the plastic, prepping the surfaces is important. We first used soap and water to clean the trim. Glove-up and in a well-ventilated area clean the trim with IPA (isopropyl alcohol) prior to application. (We used denatured alcohol.) C4 recommends applying at temperatures above 41°F (5°C) and out of direct sunlight. Use the lint free application pads supplied to wipe the coating onto the trim. C4 states “because the coating forms its bond immediately, it is very important you remove excess coating from the treated surface and any that has gone onto your car’s bodywork or glass as soon as possible. To remove residue, you should use a microfiber cloth and use a light touch, i.e. not like buffing a wax but more like using a chamois on your car.”
Our Results
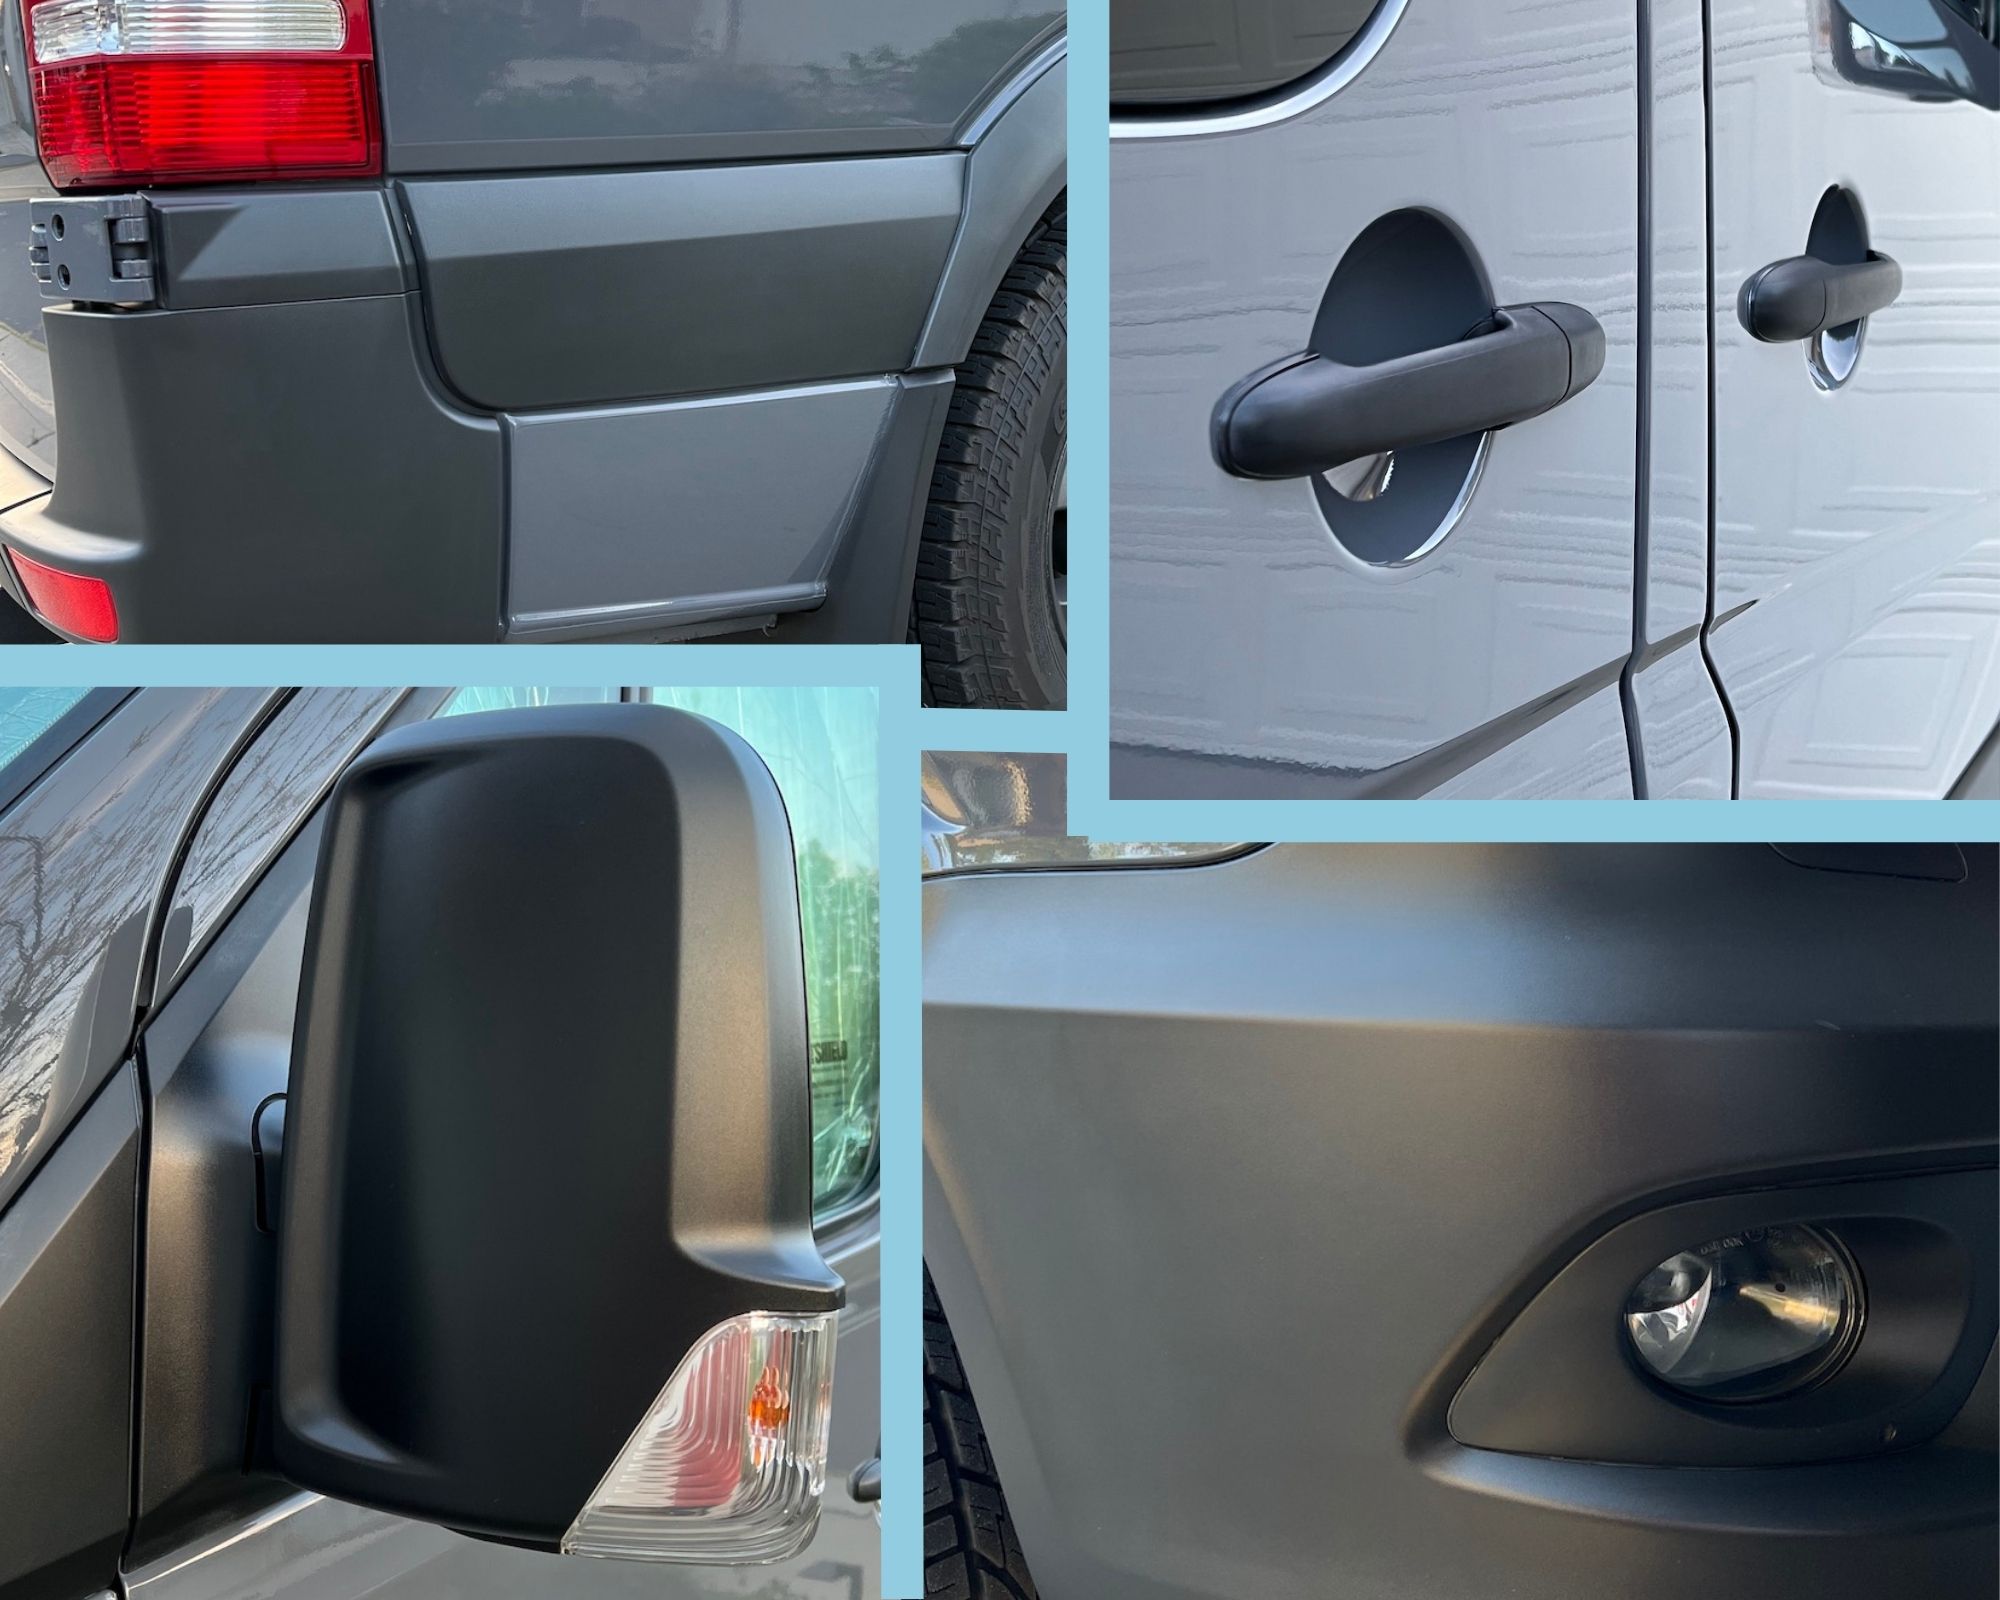
In our experience, applying the alcohol to the trim cleaned up stains were we not able to remove with soap and water alone. There were essentially five years of contaminants embedded in the plastic, not to mention a half dozen other trim products that the alcohol removed. Applying the C4 made the bumpers, mirrors, door handles and body trim look basically brand new. The treated surface felt smooth, while past products we tried left the surface feeling greasy. Because C4 is a ceramic coating, it should provide the longest lasting protection available.
MOST of the results on our van were amazing. The bumpers, mirrors, door handles, side trims and mud flaps went from gray to black. It’s so good it looks brand new. The first photo on this page shows what an amazing transformation was made on the rear bumper.
HOWEVER…
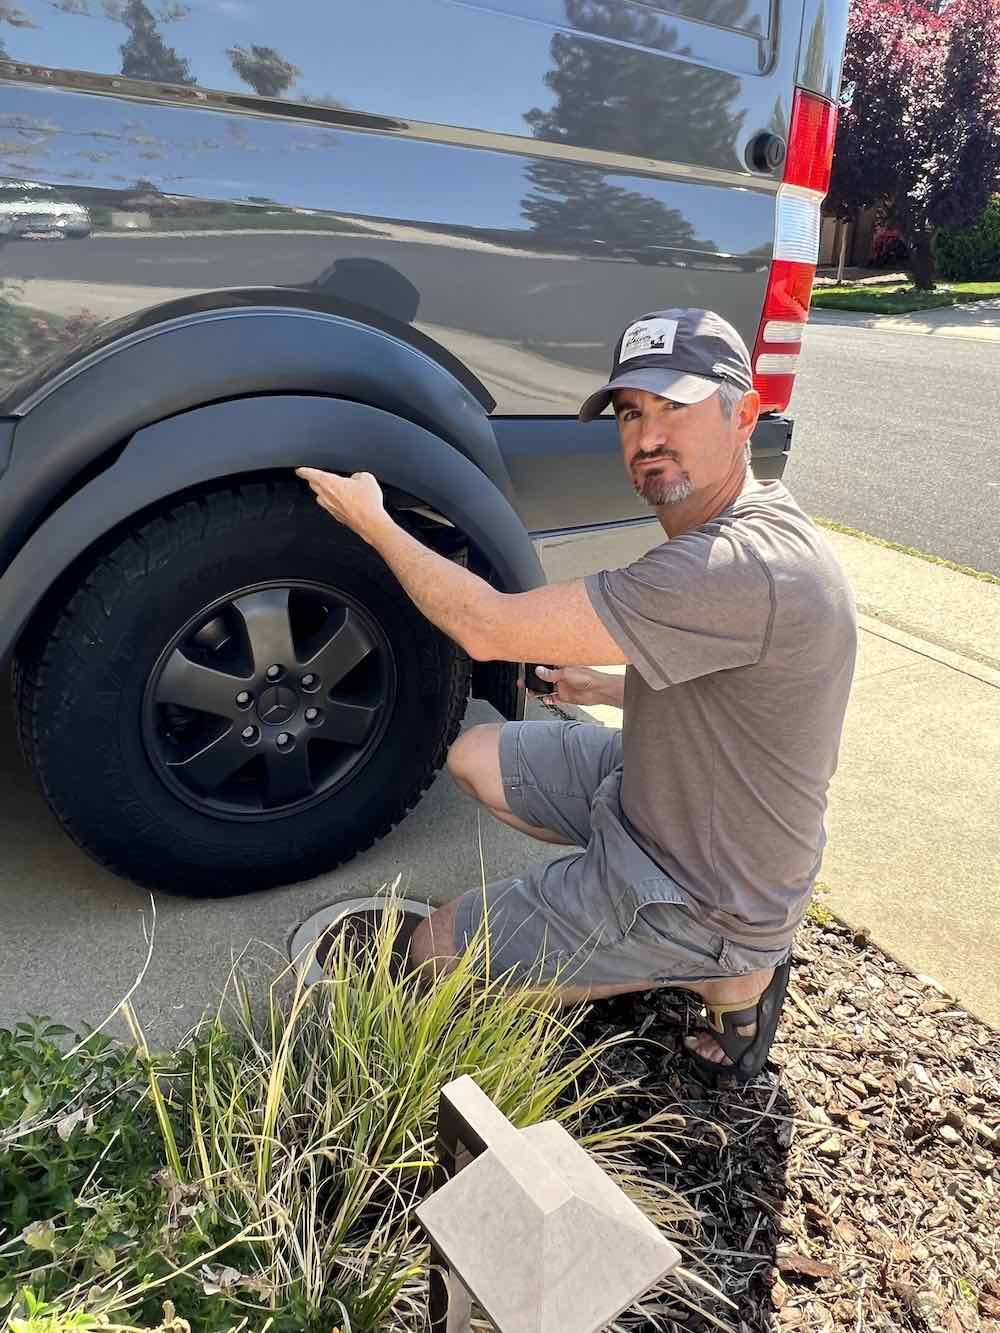
The most faded trim pieces on our van were the rear fender flares and the rear bumper. It is apparent that the fender flares are made from a different type of plastic than used on the rest of the van. C4 was able to restore color to the rear bumper. While C4 helped restore some color to the flare (and provide more protection in the future), it was not enough to our liking. I think the take-away here is the C4 works on most types of plastic, but perhaps not all. And if the plastic is really faded, it’s possible it may not restore it to your liking, but should protect it from future damage.
We ordered brand new fender flares from Mercedes-Benz because we thought ours were too far gone to restore. (Believe it or not, they are under $30 each. | Driver’s Side | Passenger Side). If your flares are shot like ours, there’s one last thing to try before you inevitably replace them.