


Headliner Shelf the Easy Way
If building your own headliner shelf is not in the cards, we have two excellent options for you. The first is a completely pre-fabricated headliner shelf from Flatline Van Co. No fabrication is required and it bolts in place. The L-track compatible mounting holes for securing gear is a nice touch.
The second option is a partial-DIY solution, the Vancillary Headliner Shelf Kit. Kits are available for both the 2007-2018 NCV3 Sprinter as well as the 2019+ VS30 Sprinter. The kit takes all of the guesswork out of building the headliner shelf. You simply: (1) Use the included paper template to trace the shape onto plywood; (2) Cut with a jigsaw; (3) Paint, stain or wrap the shelf in upholstery; and (4) Install using the included brackets.
A Note about Materials
Baltic Birch is typically sold in 5-foot by 5-foot sheets. A 1/2″ sheet usually has 9 cross-banded plies adhered together to make a strong product. We would not recommend using low grade plywood as you may find it will warp and sag. We found this article to very helpful in describing the advantages of good quality baltic birch plywood. In short, use good quality plywood.
Do-it-Yourself Headliner Shelf the Harder Way
Our YouTube video below details all of the steps in making your own headliner shelf. We recommend watching this first then referring to the instructions below.
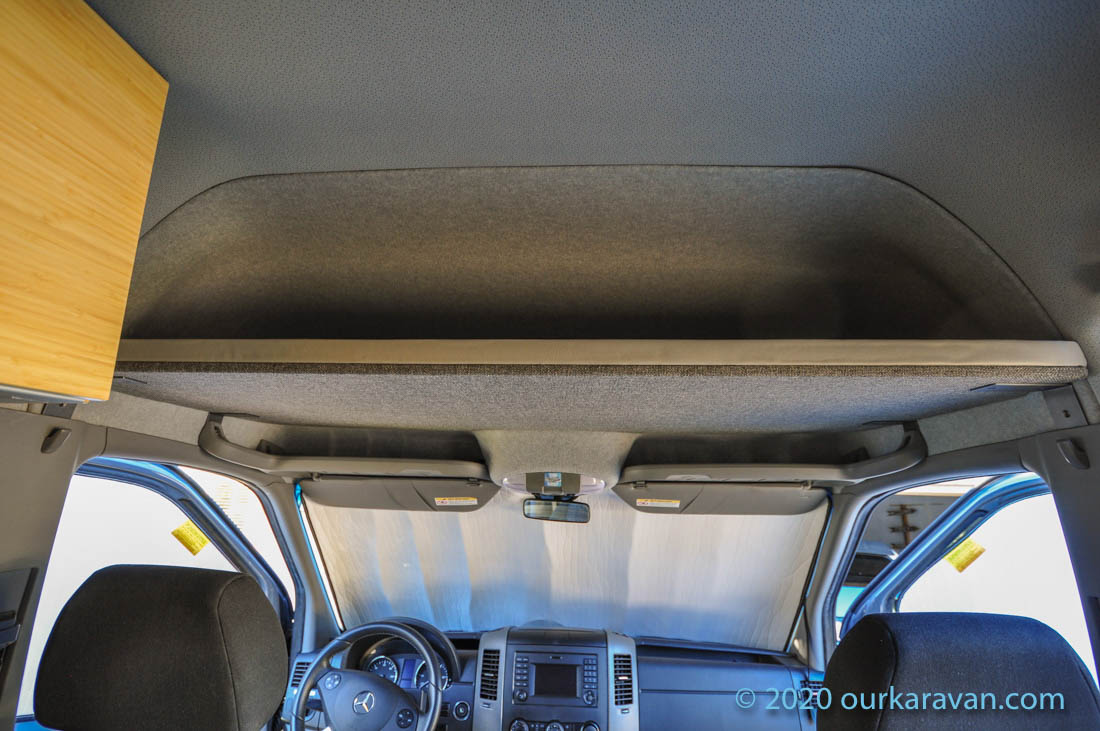
The process described below is not necessary if you bought the Vancillary Shelf kit. Read on for the DIY version of the headliner shelf. The instructions assume you want the shelf mounted at the same height as ours.
Measure and Scribe
You must first determine the height at which the shelf will be placed. The height is dictated by the length of the installation brackets as well as the location of the mounting holes pre-drilled in the brackets. On the rear brackets (the larger ones), we used the middle of the three pre-drilled holes. The screw that retains the factory coat hook on the B-pillar will pass through this hole. On the front brackets (the smaller ones), we used the set of holes closest to the 90-degree angle. The passenger grab handle bolt will pass through this hole. Hold the brackets up to simulate the position of the shelf and measure across at the widest point. Ours was 57-1/8″, but you will likely need to add 1/8+” if you are not wrapping the shelf in fabric.
Using cardboard, scribe the two front corners to match the contour of the headliner. You will also need to scribe around the pod that holds the dome lights. Once the dome light area and two front corners are scribed you can trace these onto your plywood.
Do a Test Piece
We recommend testing fitment with either a cardboard mockup or a cheap sheet of 1/2″ polyisocanurate insulation. This ensures good fitment before you cut your plywood. If you have ANY questions about fitment, be sure to cut large, as you can always remove material later.
Cutting the Plywood
Cut the 1/2″ plywood using a jigsaw. Our shelf ended up 57-1/8″ at the widest point and 24-5/8″ at the longest point. Keep in mind we wrapped ours in upholstery, so you may need to add 1/8″ or so if you plan to paint or stain the shelf. At this point do a final test fit and remove any excess material. You will end up removing some material near the back of the shelf where it meets the B-pillar.
We then cut a 1-1/4″ high ledge to screw to the back of the shelf. (Cut to the same width as the back portion of the shelf.) This helps keep items from sliding off the shelf. You may screw it on at this time if you are painting or staining the shelf. If upholstering, do not screw it in place at this time.
DIY Shelf Brackets
We found a set of brackets that work well on the Sprinter vans, with some modification. You will want this front bracket (125x85mm) and this rear bracket (175x105mm). Both brackets require increasing the bend from 90-degrees to about 99 degrees for the front and 102-103 degrees for the rear brackets. We did it by heating up the bracket and applying force, as shown in the video above around the 9 minute mark. In addition the front brackets are too long and require a section be cut. The cut section is not visible once installed on the van. The holes in the brackets just happen to line up with the mounting locations inside the van.
Finishing the Overhead Shelf
If you have chosen to paint or stain our shelf, you may do that now with the rear ledge in place. If you plan to upholster, you will need your fabric of choice and some 3M-90 spray adhesive. (All parts linked at the beginning of this tutorial.)
Lay the fabric face-down on a flat surface and place the overhead shelf on top . Trim the fabric around the shelf leaving at least a few inches of extra material. You need enough material to wrap around the corner of the plywood and glue it in place. Where the fabric curves around a corner, cut scallops in the fabric. This is detailed at 12 minutes and 30 seconds into our YouTube video.
Gluing the Fabric to the Overhead Shelf
Spray the contact adhesive on the back-side of the fabric. Now spray adhesive on the under-side of the shelf. (“Under-side” as-in the side you would see if looking up from the driver’s seat.) Carefully place the shelf on top of the fabric. You only get one shot at this–once the fabric comes into contact with the shelf it would be a destructive process to remove it.
Spray the perimeter of the top of the shelf with the adhesive. You can now fold the fabric over the corner and it will adhere to the top of the shelf. You may want to read our Upholstered Wall Panels article to learn some tricks on completing the corners.
Lay out some new fabric on a flat surface, face-down. This time, trim the fabric to the same size as the top of the shelf. You can now spray the back side of the fabric and the top of the shelf with adhesive and stick them together. This upholsters the top of the shelf and hides the extra material you wrapped up from the bottom.
Upholstering the Shelf Ledge
Begin by cutting enough upholstery material to wrap completely around the ledge. (This step is detailed at 15 minutes and 20 seconds into the YouTube video.) Lay the fabric down where the ledge will reside and screw the ledge in place. This traps the fabric between the ledge and the shelf. Using the same techniques as before, spray adhesive on both the fabric and the ledge and wrap it completely around the ledge. The upholstery is now complete.
Shelf Installation
We screwed the brackets to the van using the factory coat hook at the rear and the factory screws for the grab handle at the front. Put the shelf in place and mark where the holes in the bracket touch the shelf. We removed the shelf from the van and pre-drilled the mounting holes. (See the video for how we prevented the drill bit from shredding the fabric.)
You may now do the final install. Attach the brackets to the van and screw the shelf to the brackets using 5/8″ long screws. Congratulations, you’re done!
Help Us Help You
We offer all of our write-ups and instructional videos for free. A lot of time, effort and money goes into developing and maintaining this website. If you find the information on this website helpful, you may use our various links when you are ready to make purchases. As Amazon Associates we will make earnings from qualifying purchases, however it costs you nothing to use them. Alternatively you may consider using the donate button below to make a simple Paypal payment, or message us if you prefer Venmo. We sincerely appreciate your visit as well as your support.