LED Projector Setup for Vans and RVs

LED Projector Setup for Vans and RVs

OurKaravan Logo

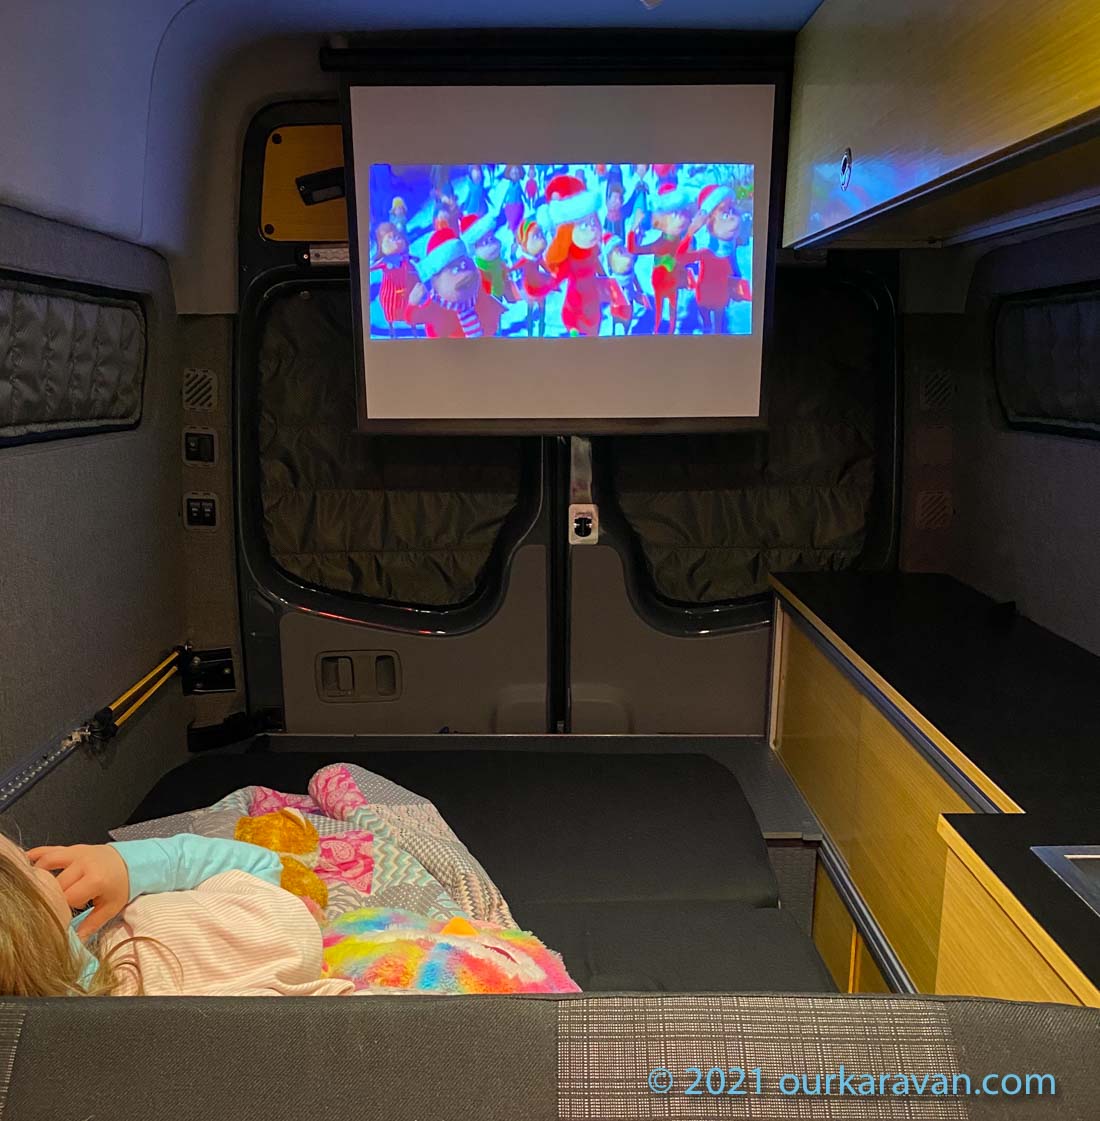
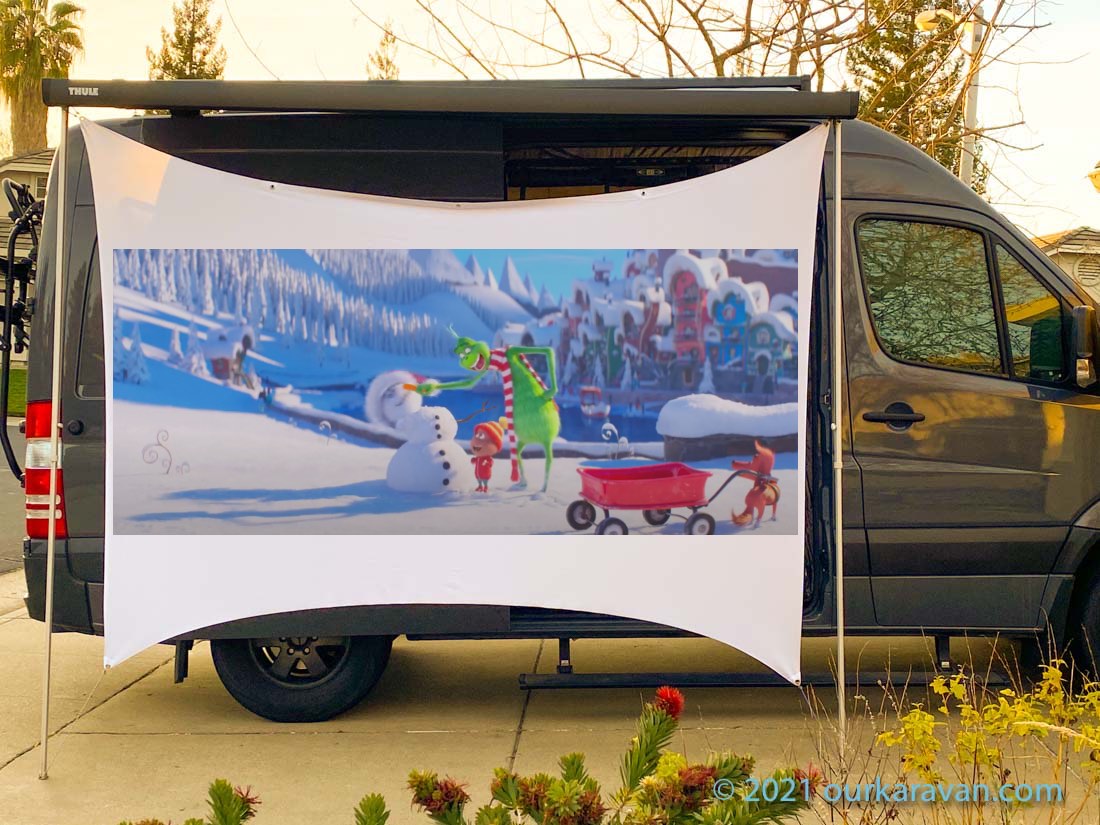
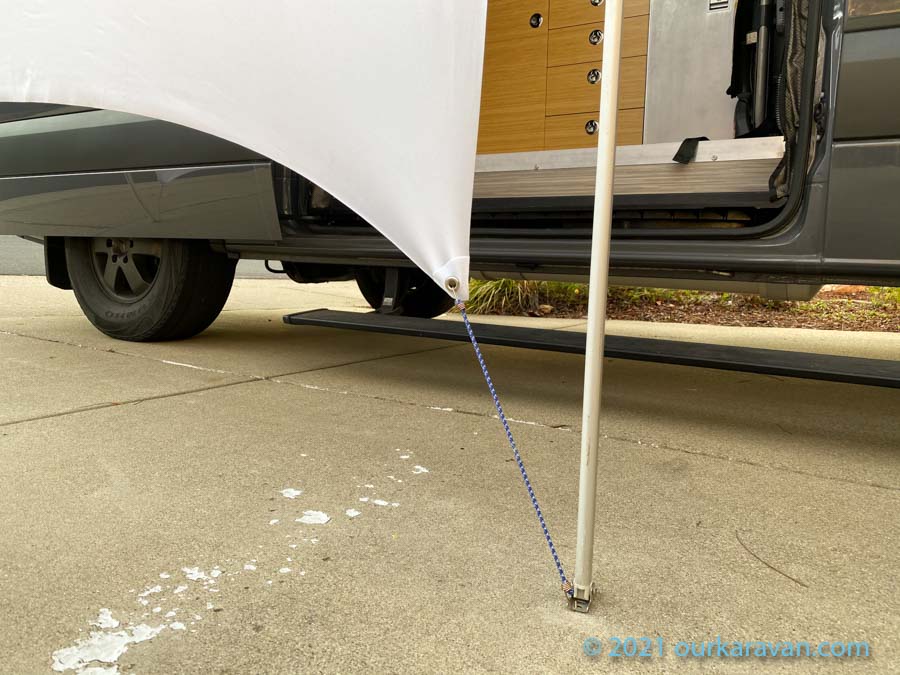
One of the neatest accessories in our DIY camper van is our LED movie projector setup.  The system is based around an LED projector and two screens, one for indoor and another for outdoor movies.  We travel year-around in our camper van, and while the purpose of the van is to get us outside, there are times when the weather simply is not supportive.  We love kicking on our Espar diesel heater on a cold evening and throwing a movie up on the big screen in our cozy little camper van.  Better yet, on nice evenings we deploy our 120″ screen and watch movies in the great outdoors!  Read on to see how we have ours setup.  

Note:  This site contains affiliate links for which I may be compensated.

Nebula Capsule Projector in a Sprinter Van
Anker Nebula Capsule Projector in a Sprinter Van

Introducing the Portable LED Projector

A few years ago technology such as this would have been unobtainable for a reasonable price.  As Light Emitting Diode (LED) technology has improved, we now have the capability to project a high quality movie from a soda-can sized device wirelessly all while running on its own 3.5-4 hour battery.  Simply insane!

We wanted our projector to have the following features:

  • Compact and portable
  • Internal battery for a CLEAN and EASY installation
  • High quality picture AND sound
  • Ease of setup and use

Other LED Projectors we Considered

After watching what felt like every projector review on YouTube, we decided the Anker Nebula Capsule Max was the best for our needs.  It meets all of the needs spelled-out above and is generally considered to be the best all-around portable LED projector.  Common complaints with competing projectors included reduced picture quality, loud internal fans and most commonly, terrible internal speakers.  The 8 watt 360-degree speaker alone makes this unit attractive over competing projectors.  Additionally, ours is capable of connecting to our phone via bluetooth and streaming music for 30 hours.

We also considered the lower model Anker Nebula Capsule (the non-MAX version), the Apeman M400 , Viewsonic M1, Aaxa P7 and the Kodak Luma 150.  Important considerations include the ANSI lumens (brightness) and NATIVE resolution of the units.  Connection options (wired vs wireless), speaker quality and whether an internal battery is used are other factors you should consider.  The Capsule Max has 1280×720 HD native resolution and 200 ANSI lumens.  Other than the Aaxa P7, the other units are all lower resolution. 

Parts Required

Projector and Screen Mounting

 Outdoor Movies

There’s nothing quite like throwing a great movie on a 120″ outdoor screen and watching with friends and family.  Achieving this is as simple as hanging the screen from your van or RV and turning on the projector.  Our projector has a 3.5 – 4 hour battery life, internal storage and a really good speaker, so no external accessories are required.

You probably won’t be surprised that we did a lot of research on outdoor screens.  What we learned is a simple white sheet won’t provide the same result as a spandex screen.  The fold lines in the cloth will significantly degrade picture quality.  The spandex stetches to remove all the wrinkles and is machine washable.  Read the reviews on this U.S. made screen–you do not want the knock off versions with the black border around the perimeter.  The border is made from a different material and does not allow the spandex to do its job to remove wrinkles.  It pays to buy the good quality one.

Outdoor Screen Setup

We find the easiest setup is to deploy our awning anywhere between 2-feet and full extension.  This allows you to come and go from the van without interrupting the movie.  We simply use a small bungie cord in each corner to stretch the screen.  We put the projector on a camera tripod using the threaded 1/4-20 screw at the base of the unit.


Layout for Projecting *Indoor* Movies

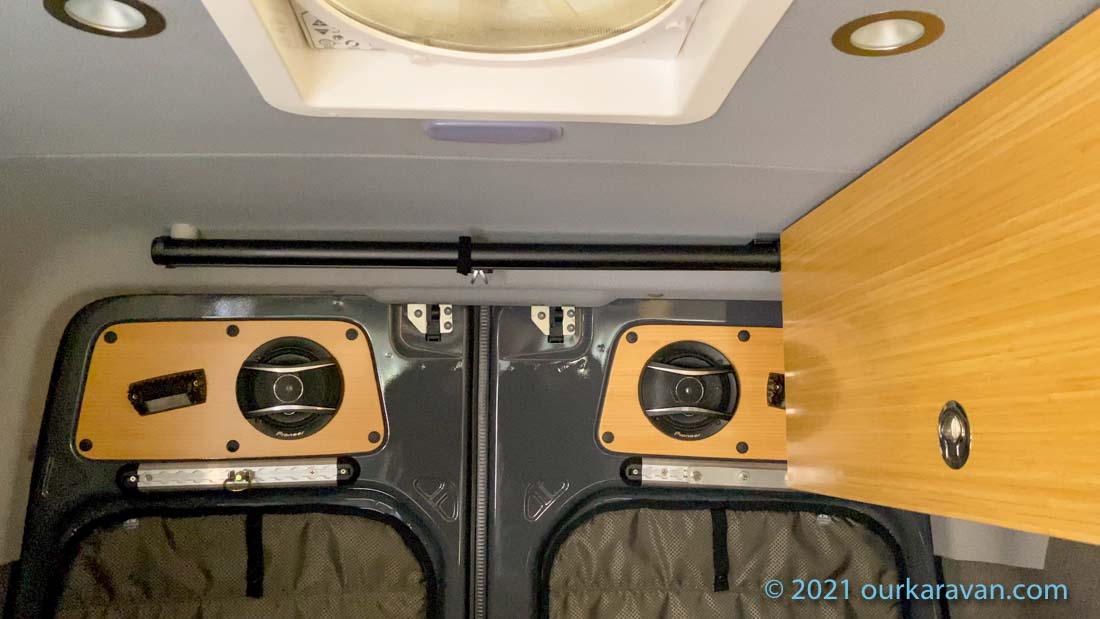
Your first objective is to determine the best place for movie-viewing.   In our van, it was best to orient the screen at the rear.  Our seat/bed folds into a chaise lounge and by projecting to the rear the front swivel seats could also be used for movie viewing.  This would allow five people to comfortably watch a movie.  Additionally, the middle of the van (where the galley kitchen is located), is still fully usable while a movie is playing.

Had we projected forward, the screen would have hung from our over-cab shelf and would have closed off the driver’s area from the rest of the van.  The swivel seats could not be used for movie viewing and the kitchen would not be usable while movies were playing.

Projection Size and Distance

The further the projector is from the screen, the larger the video will display.  However, sharpness and overall brightness will decrease as you move farther away.  Each projector has a slightly different distance it will require from the screen.  You can use this online calculator to help you calculate that distance.  Be sure that both the screen and the projector can be mounted appropriate distances from one another.

Modifying the Screen for Ceiling Mounting

The 40″ screen we used is intended to sit on a desktop.  We mounted ours upside down so the screen pulls down from the ceiling.  (We did opt to sand off the mounting feet to tidy up the install.  This is totally unnecessary but the process is shown in our install video linked below if you’re interested.)  

Opening the screen will reveal two spring-loaded arms that support the screen.  As noted in the photo below, there is room inside the chassis for bolts to pass through without interference.  We will use this to mount our projector to the ceiling. 

van projector screen mounting
Mounting area for van LED projector screen


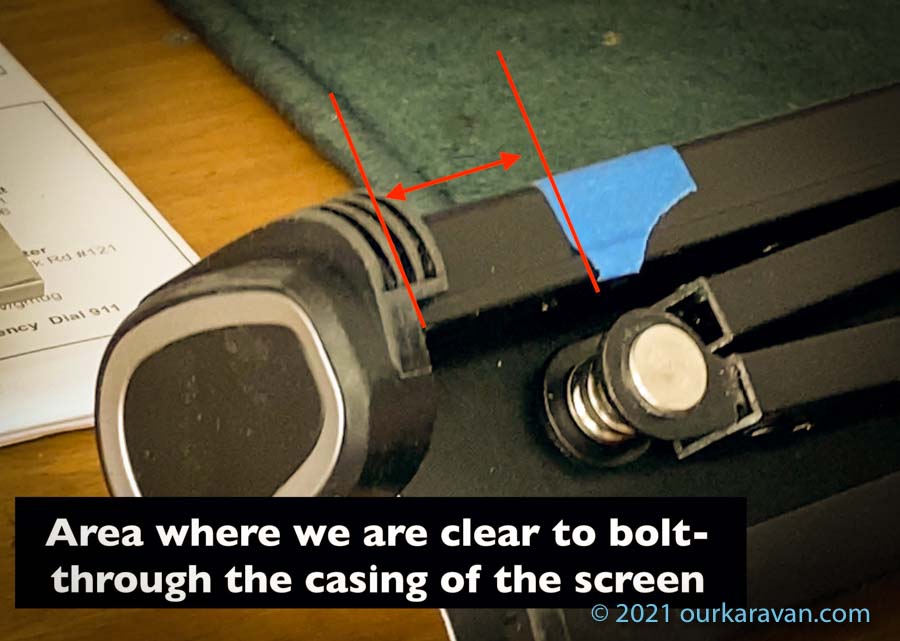
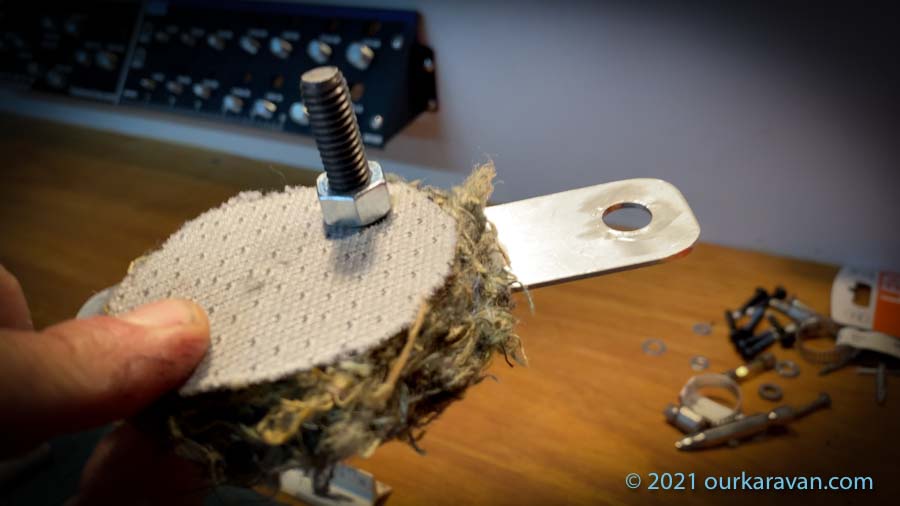
Let us help you form some ideas for mounting your screen.  For wood ceilings, drill a hole on each side of the screen chassis as we did.  You may be able to install jacknuts or threaded inserts in your ceiling to create a threaded mounting location.  This assumes your ceiling is sturdy enough.  This would allow you to bolt the screen chassis direct to your ceiling.  (You may want to use a nut in-between the screen chassis and the ceiling to space it down a bit.)  If using a stock headliner as we are, read on. 

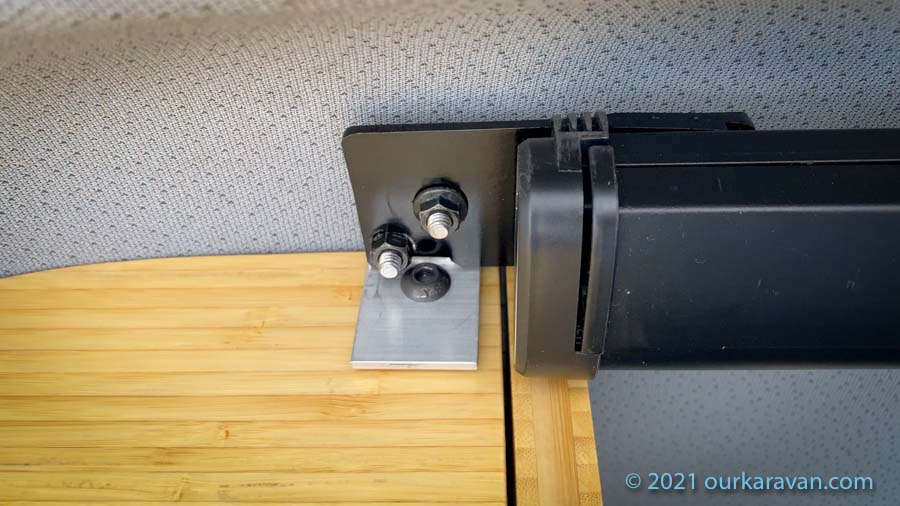
OurKaravan Left Side Cabinet Mount

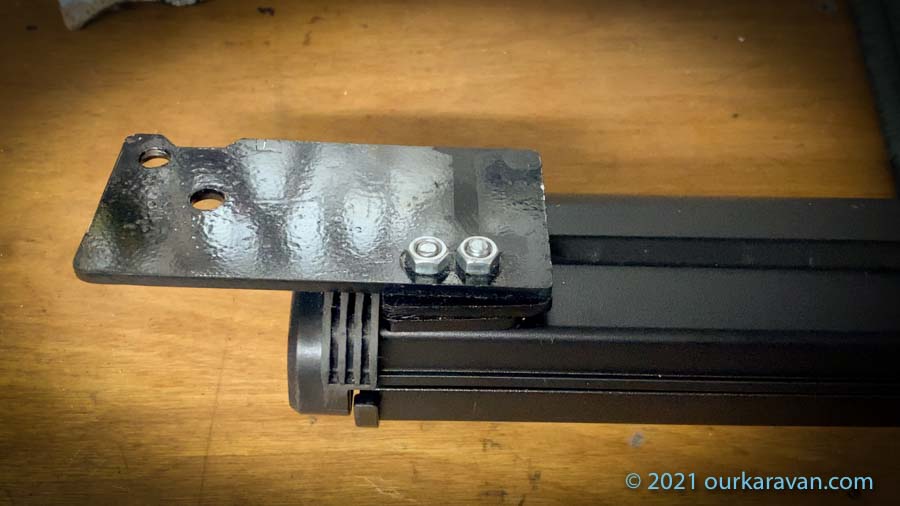
Because we have overhead cabinets on the driver’s side, it made most sense to attach one end of the projector screen to the cabinet.  We began by drilling two holes in the chassis of the screen, ensuring we stayed clear of the spring-loaded arms.  Because the chassis has a 1/4″ step, we cut a small piece of scrap 1/4″ aluminum to sit in the step to make the bottom flat.  The end-caps of the screen unit retain the spooled-up screen, and also sit 1/4″ off the chassis.  By stacking a second piece of scrap 1/4″ aluminum, we now had a completely flat surface in which to attach to our cabinet.

From here we used another 1/4″ piece of aluminum to span over to an angle bracket attached to our cabinet.  The final bracket is shown below.  

Mounting the Projector Screen, Continued

With one side mounted, we turn our attention to the other side.  With no cabinet on this side, we found the only way to support the projector was a bolt through the headliner and into the screen.  Specifically we used scrap aluminum to create a backing plate so the bolt wouldn’t pull through the headliner.  The order went bolt –> through a hole in the backing plate (like a large washer) –> through headliner –> through hole in the screen chassis with a bolt to hold it in place.  The photo on the left below illustrates the backing plate behind the headliner with the bolt coming through. 
 
While this setup worked, the skinny bolt was visible so we decided to add a round PVC puck to make the mount look more substantial.  The gray PVC puck can be seen on the left side of the installed screen, shown below.  (This material was leftover from our overhead cabinet install.  No need to buy this just to act as a spacer.)
The screen is now firmly mounted to ceiling.  It requires some force to pull the screen down, and this mount has proven to be rock-solid.  
 

Mounting the LED Projector

Earlier in this article we determined how far away to mount the projector to fill our screen.  In our case, that distance landed squarely on one of the Sprinter van’s factory dome lights.  Rather than have an exposed mount, we chose to install a hidden mount above the dome light.  The dome light easily pops out and you screw the projector into place.  

The factory headliner is not easily removable once you have overhead cabinets in place, as we do.  To avoid probably 15 hours of disassembly and reassembly, we tried our luck at using JB Weld to bond an aluminum angle to a factory ceiling cross member that resides 2 inches behind the dome light we removed.  Before adhering it to the van, we drilled a hole in the angle bracket and installed a 1/4-20 jacknut.  Most projectors use a 1/4-20 camera mount on the bottom, so 1/4-20 will make it easy to mate the projector to the mount.  

With the dome light popped out, see the bracket?  Now you can use an inexpensive double ballhead mount to screw into your bracket on one end and the projector on the other.  When we are done watching movies we unthread the bullhead from the mount and simply click the dome light back in place.  

Tips for your Install

There’s no doubt your van will be entirely different from ours.  The take-aways here are 1) the indoor screen can be modified to mount to a ceiling, 2) the outdoor screen can be placed almost anywhere, 3) the projector can be mounted any number of different ways, but perhaps the 1/4-20 bolt combined with a double bullhead mount will give you some inspiration.  Good luck and enjoy your movies!

Content Creation

We are doing our best to offer as much information as possible for free.  A lot of time, effort and money goes into developing and maintaining this website.  If you find the information on this website helpful, you may use our various links when you are ready to make purchases.  As Amazon Associates we will make earnings from qualifying purchases, however it costs you nothing to use them.  Alternatively you may consider using the donate button below to make a simple Paypal payment, or message us if you prefer Venmo.  We sincerely appreciate your visit as well as your support.   

Watch our video on the Projector and Screen Install

Leave a Reply