

Have you seen the insulation install video on YouTube?
Why Trust us regarding Insulation?
We do a ton of research before deciding what products to use in our van. You won’t ever want to have to open up your walls to deal with wet and moldy insulation. We installed our insulation package in January 2017, which makes it over 7-years old now. We have pulled wall panels in our van for wiring upgrades and found the insulation to look exactly as it did over seven years ago when we installed it. While it was dusty, there was no sign of it moving or settling in the walls. More importantly, there was no musty, moldy odor or signs of water damage. If we were building another van today, we would use the same products and install methods.
Purpose of Insulation
The purpose of insulation is to slow the transfer of heat in and out of the vehicle. Sheetmetal is very efficient at conducting the summer’s heat straight in to the van. It is equally effective at radiating the warm heat from inside your van to the outside when it’s cold. The “R-value” of insulation helps describe an insulating material’s resistance to heat transfer. The higher the value the greater the insulating effectiveness. Unless you live in an extreme climate, our recommendation is to not give the R-value of a product the full weight of consideration. We believe there are other factors (in a van) that deserve equal or more weight when making a choice.
Important Consideration – Moisture
The first and most important factor to consider, in our opinion, is to consider how well the insulation resists moisture. A single human will lose 800mL of water per day through a combination of perspiration and respiration. Consider that your first source of moisture. If you are cooking or heating your van with propane you are now introducing a second source of moisture. Water is a bi-product of its combustion. (Installation of a ventilation fan will help mitigate this.)
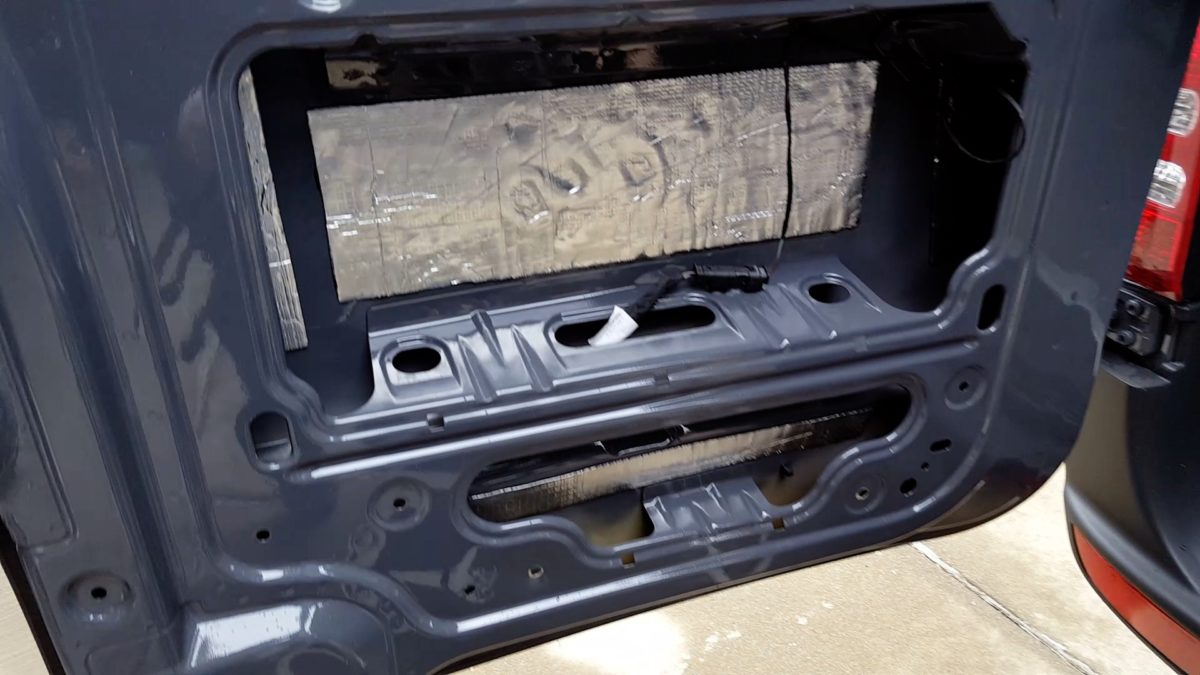
Vehicles are Not Designed to be Leak-Free
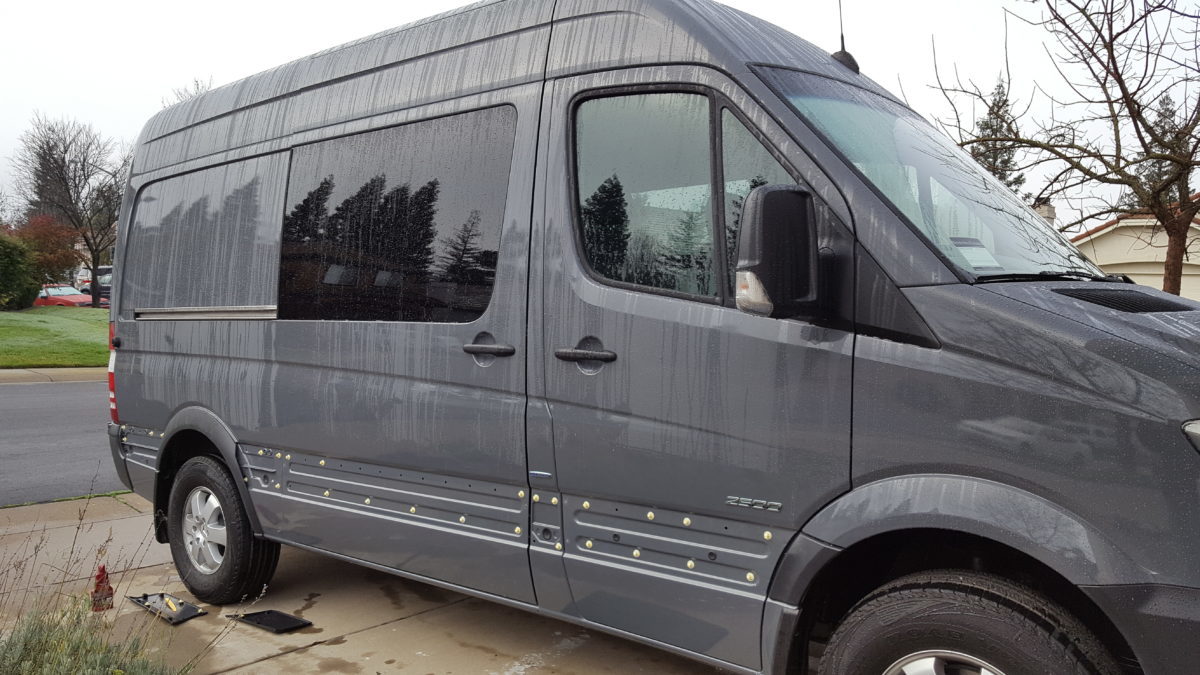
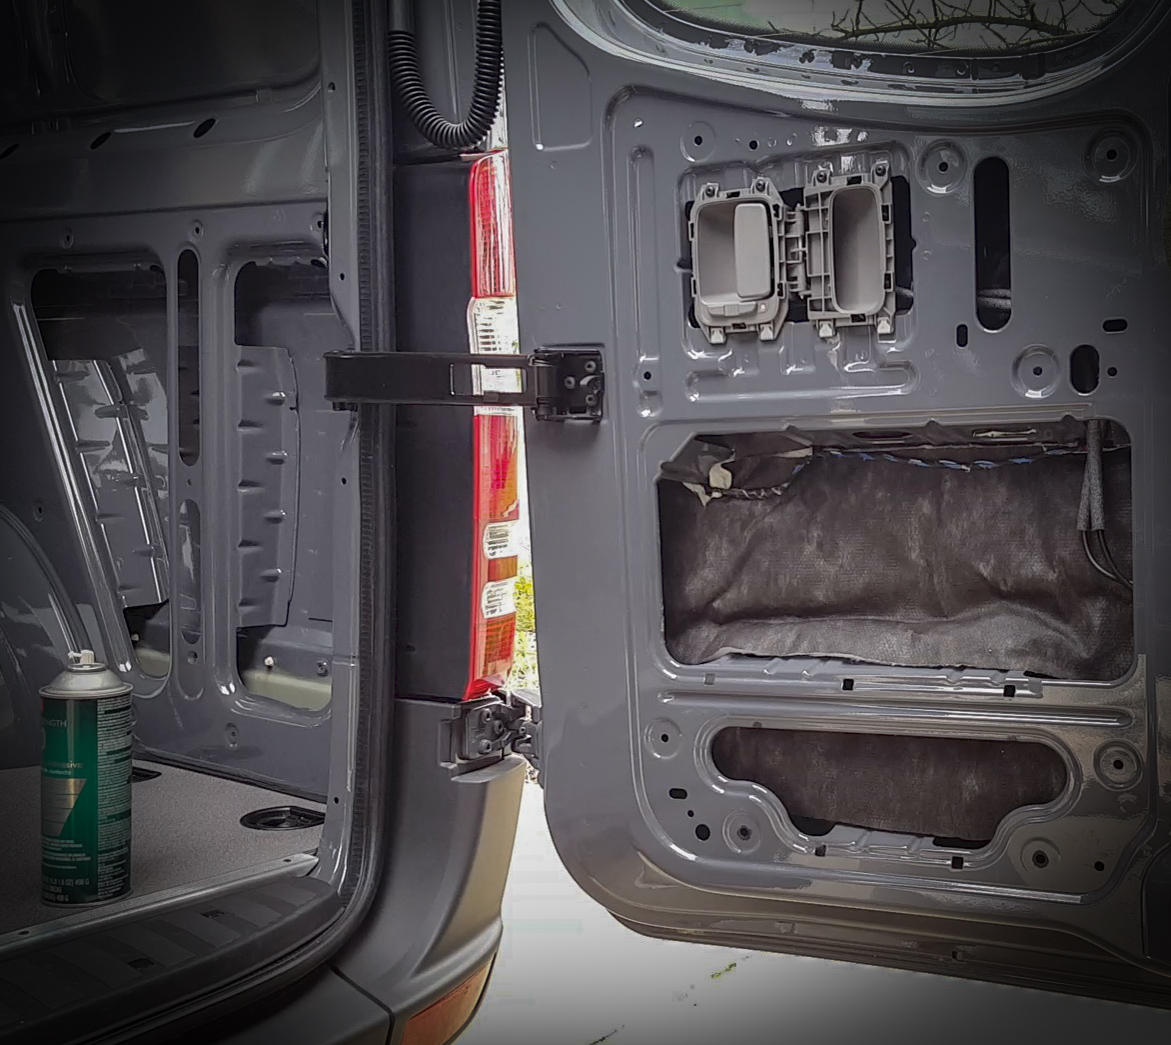
Pull the door panel of any vehicle and what do you see? There are sheets of plastic to direct the flow of water to weep holes at the bottom of doors and wall panels. Why do you think there are weep holes in the first place? Most of our vans have body-side mouldings that clip-on using plastic clips. I hate to break it to you, but these leak. Mercedes sprays the inner wall panels below these clips with wax to help speed the water’s escape. That’s how certain they are that water will penetrate. Every penetration, from door handles to windows to hinges to sliding door rails to latch hardware are all leaking right now, as we speak. Unless you live in Dubai. Or Arizona. Our Sprinter van doesn’t have a single panel that doesn’t have at least one panel penetration. Assume water will be present inside the walls.
Main Thermal Insulation – 3M Thinsulate
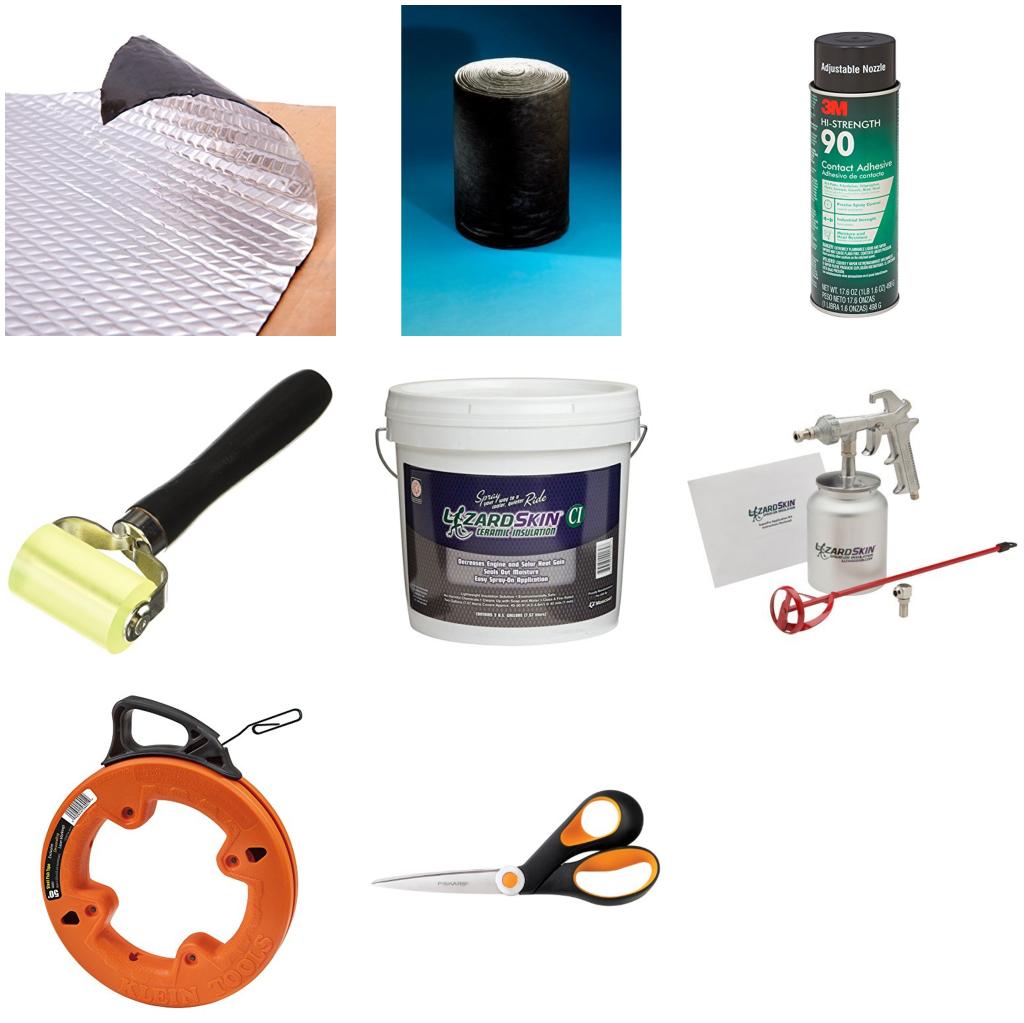
Some insulation is better at resisting moisture than others. We have read on various forums about 4-5 year old vans insulated with denim insulation showing significant evidence of mold and vehicle rust. I don’t know about you, but we want to avoid health concerns for ourselves and our van as much as possible. As a result, we can easily recommend using 3M Thinsulate as your main insulation. Thinsulate probably insulates your ski gloves, your jacket, boots and some high-end yachts and automobiles. Thinsulate is hydrophobic, which means it resists the absorption of water. It is flame resistant and meets FMVSS 302 certified motor vehicle safety standards. It is lightweight, easy to cut and install and has no noticeable odor.
Downsides of Thinsulate: it’s not cheap and there are other products with a higher R-value. Overall, we can easily and confidently recommend Thinsulate, even given it’s lower R-value, to most people building vans in reasonable climates. We also see it as a selling point at time of van resale, given its reputation within the automotive and marine industries.
Ordering Options: Pre-Cut Thinsulate or by the Roll
You have two options for ordering Thinsulate. The first is to buy PRE-CUT THINSULATE for your specific van. Pre-cut kits are available for Sprinter, Transit or ProMaster. Choose your model and wheelbase and you’ll get a diagram to show where your pre-cut Thinsulate should be placed in your van walls.
The second option is to order Thinsulate by the Roll (eBay link). We used 50-feet in our 144″ wheelbase Sprinter, which has the crew windows (in the second position) and rear door windows. We had a comfortable but not excessive amount of leftover. We recommend 50-feet for a 144″ Sprinter, 148″ Transit and 158″ Promaster. 60-feet is recommended for the 170 Sprinter and 70-feet for the 170-Extended Sprinter. Most high roof vans will require 50+ feet, so be sure to select the appropriate length when ordering by the roll.
How to Install Thinsulate
To install, cut the Thinsulate to fit in the wall cavities. In the upper wall cavities, of a Sprinter anyway, the Thinsulate stays-put without glue. In the lower cavities it needs spray adhesive to hold it to the walls. Purchase a few cans of 3M-90 spray adhesive, spray it on both the van wall and the insulation. The white side goes against van and the black “scrim” faces-out. Wait for it to get tacky and adhere. You only get one shot at it, once it touches the glue on the wall, it’s stuck.
Use a Fish Tape to Help in Hard-to-Reach Areas
For hard-to-reach areas, use a fish tape to help with insulation placement. We used this method to feed insulation through the center of the overhead ribs. We also used the fish tape in the enclosed space on either side of the windows. Using the ceiling ribs as an example, we first fed the fish tape alone through the rib. Now poke a hole in the black scrim of the insulation, hook it to the fish tape and pull it through. We were told most use between 40 and 50 linear feet in a 144″ Sprinter. We bought a 50 linear-foot roll and had leftover in our 144″ wheelbase Sprinter.
Panel Dampening
The Thinsulate provides our thermal insulation and also offers some respectable noise-cancelling properties. However, we found that application of small amounts of butyl mat helps further reduce noise intruding into the van. The brand name Dynamat is commonly known–we use the less expensive Noico 80-mil. Specifically, the Noico acts as a panel dampener. The interior of most modern vans will have strips of it from the factory. Our 2016 Mercedes Sprinter had so much of it in the front doors there was no room to add more. If you watch our YouTube video on Part 1 of our insulation install, you will likely be able to hear the difference in the rear door panels before and after installation of the butyl dampener.
The Effect of Panel Dampening
The best way we can describe it is to say it helps panels sound less “tinny.” That said, you don’t have to use a ton of it. Generally 20-25% panel coverage is all you need. We used 40 sq ft (four 10 sq ft packs) for our 144” wheelbase Sprinter and it was plenty. There are diminishing returns for using lots more of it, and it is heavy.
How to Install Noico Panel Dampening
To install, clean the surface of the van with mineral spirits. Peel the backing off the Noico and stick it to the metal. Finally, use a roller ($6-$7) to compress the Noico until the pattern on the outside is flattened. The panel dampener works best near the middle of large panels to absorb panel vibration. 20-25% coverage should be plenty. Any amount you add, even when used very sparingly, does help.
Want Some More Information?
Most of you can stop here and know you have a very good insulation and sound deadening package. If you want to know more about our thoughts on radiant and vapor barriers, as well as Lizard Skin ceramic insulation we applied, read on.
Radiant Barrier/Vapor Barrier – Why We Skipped It
Now we have panel dampening and thermal insulation handled, is there more we can do? Here’s where more controversy and opinions come into-play. Some people will use Reflectix, which is designed as a radiant barrier. Radiant barrier can be used when an airspace is present to reflect radiant energy. Reflectix alone has almost no R-value, and we’ve seen far too many van builds where it is glued it straight to the van’s sheetmetal. We think this is a big mistake. For one, a 0.1 R-value is doing next to nothing. Second, the thin-foiled aluminum will efficiently absorb heat and conduct it through the wall of the van. It’s possible that it’s worse than if it weren’t there at all, but we will digress at this point. This short video illustrates what may be happening when you glue Reflectix to the van wall.
Reflectix and the Air Gap
Reflectix can be effective when it is taped and sealed to the walls of your van where an airgap exists between it and your other insulation. The air gap is required to reflect radiant energy outside. Some think it can act as a vapor barrier to prevent moisture produced inside the van from condensing on the inside of the van’s sheetmetal walls. For one, we question the ability of moisture to pass through plywood walls wrapped in closed cell foam and tweed, through a thick layer of Thinsulate, then condense on the walls. Seems to us that moisture will instead take the path of least resistance and go out a vented window and/or vent fan.
Some van builders believe use of a vapor barrier inside a van is a bad idea because it can trap moisture between the Reflectix and the metal skin of the van. We aren’t talking about rivers of water that would go out the van’s weep holes, we are talking about moist air trapped in the walls from all of those leaky penetrations in the vehicle we discussed earlier.
Why We Tore all the Reflectix Out of Our Van
We experimented with Reflectix and tore most of it out of the van. There were only two places in our van where we think it will be effective. When we pulled the domed cab headliner, we glued Thinsulate to the ceiling of the van. We then covered the top of the cab headliner in Reflectix as there is a nice air gap between it and the metal ceiling. We have some Reflectix in the upper walls, where a slight airgap does exist. There is no airgap between the wall panel and the Thinsulate at the mid-wall level inside the van.
Reflectix Can Turn into a Heatsink in a Van
The van’s internal support ribs are attached to the outside skin of the van, which means they are thermally-connected. Your insulation is essentially bypassed in these locations. We discovered that when we had Reflectix spanning these support ribs, rather than just the ribs radiating heat, the Reflectix was very effectively absorbing and conducting that very same heat from a small support rib to the entire surface of the Reflectix. It came a big heat mat. As such, it is now removed from these locations and only used where a proper airgap exists. In our opinion, we would skip Reflectix entirely. We know it’s a favorite of the van world, but only when implemented correctly, and it rarely is.
Vans and the Vapor Barrier
As for the “vapor barrier” concept, we can’t see it doing its job there either. There would be penetrations everywhere in the Reflectix for plumbing and wiring. Do you know why there are open vents in the rear columns of the van? There are flapper-doors behind the rear bumper skirt that allow free-movement of air from the van interior to the outside. This enables you to close your doors without slamming them. More important, the venting is required to allow the dash heating and air conditioning to distribute air inside the van. Seal the van up and your HVAC will no longer function properly. So why bother taping over and covering every penetration with Reflectix when you know the van has to move air to function properly?
Do what you want, but we would pass on this.
Taking it a Step Further – Ceramic Insulation
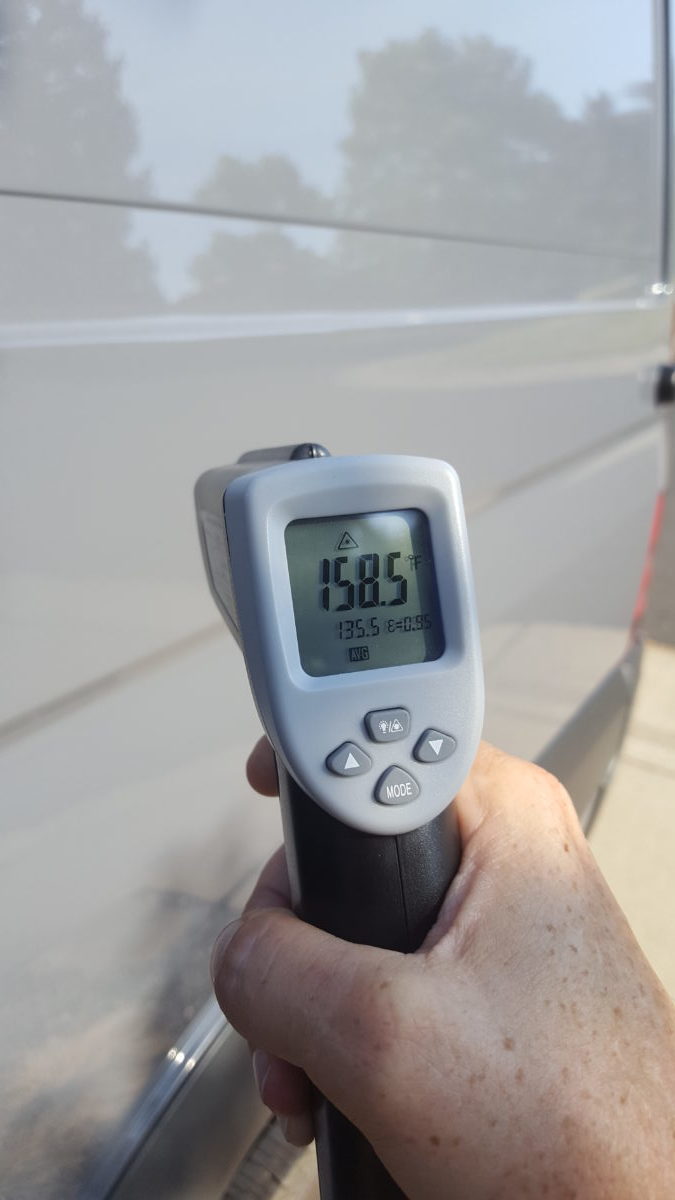
Being the a scientist by-day, we’ve been carrying a non-contact thermometer with us the past year and half in an attempt to learn how to keep our van cooler in summer. What we found is the bare metal ceiling in our dark gray van can get so hot you can barely touch it. Keep in mind we have a giant 39” x 65” solar panel covering much of the roof. Here are our observations:
Morning Hours in Full Sun: The steel ceiling with no solar panel coverage gets hot very quickly. Below the solar panel, it is cool to the touch, for a while.
After Three Hours in the Sunlight: The van’s sheet metal has efficiently spread the high temperature. The ceiling with no solar panel coverage measures 166-degrees Fahrenheit on a 105 degree day. The portion of ceiling under the solar measures 151-degrees Fahrenheit.
Conclusion: We need to do something to reduce the sheetmetal’s efficiency at conducting heat.

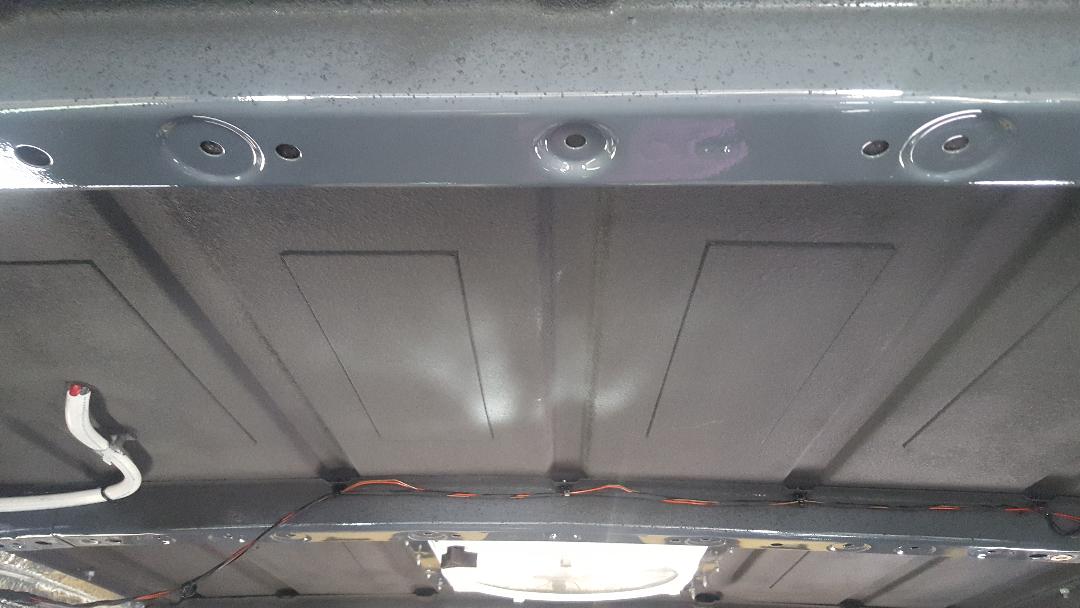
Using Ceramics to Reduce Heat Flow (NASA will be proud)
Enter Lizard Skin. Ken’s father initially told us about this, as it is commonly used by people with hot rod cars putting very large engine in very tiny classic cars. Lizard Skin is sprayed on the firewall and transmission tunnel to help keep the interior of these old cars cooler. Ceramics are not very efficient at conducting heat, unlike the van’s sheetmetal. Lizard Skin has tiny beads of ceramic embedded in the “paint” and it helps slow the transfer of heat. Remember, that’s all we can do with insulation, is slow the heat transfer.
Lizard Skin advertises that the heat entering the interior can be reduced 30-deg F or more. It sounds like BS but we can tell you without a doubt it works. The surfaces in our van that have been sprayed with Lizard Skin are noticeably cooler than the ones that were not. We live in a place that has many days over 100-deg F during the summer. Having some additional thermal insulation is appreciated. Keep in mind, this helps slow the inevitable transfer of heat, but it doesn’t necessarily mean your van will stay cool as a cucumber. (Are cucumbers cool?) But it will help keep it cooler for longer. We now find that the shaded area of the ceiling (under the solar panel) remains cooler for longer.
Do It Yourself and Save Money
There are shops that will spray it for you, likely for a fairly large sum of money. A friend and I both wanted to do our vans, so we split the cost of the required spray-gun and each purchased 2 gallons of Lizard Skin. (You need a good air compressor if you do it yourself.) You have to mask everything in the van–the upholstery, the floors, the entire cab area, any furniture you have…basically, it’s going to be extra work if you do it to a half-completed van like we did.
Avoid Getting Lizard Skin in the Door Hardware
The van’s sliding door contains a lot of moving parts including cables, latches, sensors, etc. We did not want to risk gumming up any of that with the insulation, so we left it alone. We also did not spray insulation on the floor or the lower walls below window level. This is because, again, our van had a completed floor and lower cabinetry in the way. We sprayed a total of 1.5 gallons of Lizard Skin in our van. To summarize, our van only has it sprayed from the ceiling down to the bottom-of-window level. There is no Lizard Skin in the sliding door or the rear doors. Most of the heat from the sun comes from higher up the van walls, so it still served a great benefit in our van.
In What Order do I Place These Products?
If you’re doing the everything we described here, the Lizard Skin gets applied against the bare metal of the van. It can go on first, or in the case of my van, it can be sprayed over the Noico just fine. Next add Noico (if you didn’t already add it), then the Thinsulate, then your wall panels. Just like the Noico sticks to the Lizard Skin fine, 3M-90 glue sticks to it as well to keep your Thinsulate in place.
Hi Ken,
Thanks so much for the great information you provided. It’s a great website. I live in Claremont California, also very hot in summer like your place, so I am considering to put a layer of Lizard Skin once I get my van. Just wondering if you know that Lizard Skin is environmental safe or not. My wife is sensitive to some chemical products, so I am trying to use as much green stuff as I could. I am going to google information about it, but if you have information about it can you please let me know? I appreciate your help.
Best,
Jake
Hi Jake, thank you for the complements on the website. I’m working hard on adding additional content.
Lizard Skin appears to be reasonably environmentally friendly and it is water based. Here’s the Material Safety Data Sheet: https://www.lizardskin.com/assets/files/Safety-Data-Sheet-LSCI-6-1-2015.pdf
It does have a smell for a couple of days but leaving the van opened up the first few days after spraying will remedy that. No smell since. I hope that helps!
Thanks for the info! For the panel dampening, I’m curious if you put any Noico on the floor and if not, why not? Thanks!
Hi Amy, I did not. Panel dampener is not really needed on the floor as it will already be dampened by everything you have on top of it. I did use 3/8″ closed cell foam in the low points of the floor ribs, then 1/4″ closed cell foam over that to serve as insulation. I would use the panel dampener elsewhere. I hope that helps!
I’m considering Polyiso for my new van. Almost twice the R-value of Thinsulate. Highly water resistant. The only downside I have heard about is squeaking if it comes loose under the wall/ceiling covering. Did you consider it?
Hi Tre, I used some polyiso in my floor but chose not to use it anywhere else. I have used the expanding foam around my house and that stuff is pretty much permanent. Expanding foam is what is used to hold polyiso in place. I was worried about future body repair with polyiso glued in place with expanding foam, in the event the vehicle needs to be repaired in an accident, it would be a bear to do any such work.
Hey Ken!
Like everyone else has said, your content is fantastic and I appreciate all the work you put into making all of this information available! I just managed to find a van to convert and am trying to decide an insulation package for up in the Pacific Northwest. I am considering using Lizard Skin, but curious how effective you thought it would be in colder climates? I’ll definitely be experiencing colder weather more often than hot so am curious if ceramic could also be as inefficient at conducting cold? Thanks!
Thank you, I always appreciate the kind words. The purpose of the ceramic is to reduce the efficiency at which heat is conducted through the sheetmetal, whether its from the outside in or vice-versa. I never really thought much about its ability to maintain heat in the winter but on a past coastal camping trip a friend pointed out one morning that there was condensation on the sides of the van, EXCEPT for the lower walls. I didn’t think much of it but when I saw the same thing the following morning I remembered that I sprayed Lizard Skin everywhere but the lower panels, and that’s because I had existing cabinetry in the way. So basically, there was more of the van’s diesel-heated air escaping through the lower wall panels (where there was no Lizard Skin), which heated the sheetmetal and prevented condensation. So I think that’s proof-positive it does work! The effects during the hot summertime is easier to notice.
Never hurts to do a little research before implementing! There are lots of opinions about how to best do it, but what I hope to provide is why I am building my van a certain way as well as the logic behind why I made those choices. Good luck with your build and thanks for stopping in!
I just want to say “thank you”!!! Such an awesome web site and a treasure trove of info. There is so much out there…so to rise to the be amongst the top is rare. Bravo! I’m impressed…and I’m so often unimpressed..
I am in the process of converting my 2017 144 sprinter van… and you are fantastic, simply put. Kudos and thanks. I now have the confidence – maybe lacking skills – but have the confidence that I can do this because of folks like you. I would never have the chutzpah to document the build out such as you do. So thanks, who ever you are in real life, maybe us and our sprinters will meet some day (I’m writing from Oregon). Just “thank you” for sharing so much and for being so awesome and authentic
I am quite certain that is the nicest comment ever, thank you! Probably the most important lesson I have learned with this project is what I lack in skill I can make up with by taking my time and working on it until I am happy with the outcome. I think some call it patience; and generally I don’t have a lot of it.
Good luck with your build, and thanks for writing. I’m down in the Sacramento area and visit Oregon frequently. Planning a trip up your coast next summer, on our way up to Olympic Natl Park. Perhaps one day our vans will have a play date.
Hey Ken THANK YOU….like others have said, you information is concise, and so helpful. I usually follow the lead of my engineer friends cause they love the research aspect..I am not that smart so I just get confused. Your info has been a great tool as I embark on my “moto-van” conversion of my new 2019 170 cargo. 2 quick questions: if you were to have used both their insulating and sound deadening product how would you apply i.e. one of the other and if so which first, or as you did insulation on roof and wall above windows and perhaps sound proofing on the lower and floor. 2nd is they recommend scuffing the surface a tad prior to application. I did not see this in your video, but did you do any prep other than cleaning the surfaces? Thanks again…you blog has saved a few migraines already!!!!
Thanks Josh, I always appreciate the feedback, especially when it’s positive! As you know, I only used the ceramic insulation and not the sound deadener. Lizard Skin’s website says which order to apply them when you use both. (I remember seeing it in the FAQ but don’t recall exactly what it said.)
Had I started with a bare cargo van I would have sprayed most everything. The only reason I didn’t spray down low is I had existing cabinetry in the way. For my needs, which is repelling the high heat in my area, it’s most effective up high where the sun is hitting the van. Be careful in the sliding door and rear doors. Lots of latches, sensors and moving parts. I didn’t spray mine at all because I was worried about gumming up something important.
I know it is recommended to scuff the paint. I couldn’t bring myself to do it. Not only the labor but I was worried that, let’s say, you dent the roof. If the Lizard Skin breaks away, you now have an unprotected area that could rust. I’m not recommending that you go against the manufacturer’s instructions at all. But all I did was carefully go over the entire interior of the van with Mineral Spirits to make sure the surface was perfectly clean. I don’t have any reason to believe it won’t hold up great.
I hope that helps!
that was going to be my question – on how much you scuffed paint before application. So it sounds like you did not scuff or sand and if so have you checked for any delamination of the Lizard skin? I’ve seen one user devote 2 exhaustive days on scuff sanding, another just buffing with scotch brite. Both of those sound painful to endure. Let me know your experience. Thanks much, as the Lizard skin seems well worth the cost an time.
Hi Dana, I did not scuff the paint. I have had a wall panel off the van and there was no evidence of Lizard Skin delamination. That said, it’s always best to follow the advice of the manufacturer of the product. I was willing to take a couple hundred dollar risk with the product and not take 2 days to do it.
I have a question about ordering items thru one of your links. If we click on the link to get to Amazon buy the item and then buy something else(add to the order) do you get credit for it? Want to help out as much as possible.
Hi Cliff,
From what I have gathered, when someone clicks on the link and buys an item within a certain amount of time (I think it’s around 24 hours), then I get credit. If other items are purchased I think I do get small credit as well. Of course it’s all anonymous so I have no idea who’s buying what. I really appreciate your support; it really helps!
If I use one of your product links to get to amazon and then navigate and buy something else(maybe a different style or model) do you still get credit? Or does it have to be the specific product that is linked?If so whenever I buy something from amazon I will do that just so you get something in return for all your effort.
It does work. I know some of the schools give out an Amazon code and ask parents to use it when buying things on Amazon. It’s really kind of you to ask.
HI Ken –
Your site is a fantastic resource. Thank you for what I am sure is a huge extra effort on your part.
My question pertains to the exterior molding you removed and the “body trim clips that leak”. I just ran across other post regarding this and wanted to ask you if you have done any video on the removal of the panels and how you sealed the clips. If you have, could you direct me to that video, if not, can you walk me through the process of removing the panels without destroying anything and what sealant to use.
Thanks –
Hugh
Thank you Hugh! The body trim clips are the very first project I did on the van. It’s really the only aspect of my build that I did not document. Sorry! There’s a great thread here: https://sprinter-source.com/forum/showthread.php?t=42065 Note: don’t use silicone or latex caulk, use polyurethane.
Thanks Ken – is there a polyurethane sealer you recommend?
Not necessarily, I just looked around at Home Depot until I found a polyurethane-based one in a caulk tube. I believe Dap, Sikaflex and 3M all make it. The main reason not to use silicone or other bathroom weather-stripping type caulk is they contain acid to prevent mold build up. That acid can etch paint on a vehicle and eventually cause rust. Polyurethane is pH neutral.
Thank you for your fantastic posts and videos! We have an 18 month old and just bought a 144” high roof Sprinter to convert, so your conversion is very helpful to see! I hadn’t heard of Lizard Skin, but it sounds like really interesting stuff. We live in the southeast and I’ve been really concerned about the roof getting super hot and trapping heat with all the insulation a lot of people show for their colder-climate vans.
Congratulations on the new van! Sure love ours. Lizard Skin is one piece of the insulation puzzle but not the end-all. I find it, combined with Thinsulate work very well in my hot climate. Having a big solar panel covering much of the roof helps a bit too. Good luck with your build and let me know if you have any questions. -Ken
Update: sprayed lizard skin just about everywhere (tip: make sure to do great prep-this stuff sneaks in everywhere). I used the sound deadening from window level-ish down and the floor to just behind the slider opening. Then I used the insulation from window level-ish up. I did not spray the back doors or the slider since the slider has too much going on with the window and internal parts and for me the back will be sealed from the “passenger area” as our van is used to haul dirt bikes and will only be slept in 5% of the time and then no more that 2 nights. Really happy with the lizard skin. However, on the sound deadening, I had to spray during winter to keep on a bit of a schedule and it well below the 70 degrees they recommended. However used a few heaters and a few additional hours and it seemed to be ok with a couple areas being a bit less scratch resistant than others. I am not sure if that is due to the cold temperatures not letting it set up right or the fact that I did not “scuff up” the paint first (too impatient also). I am not too concerned as I covered the floor with a wood material and the walls will get a treatment of Thinsulate, reflectix, and then wood walls. So far the ceiling and ceramic have been good. Although I will never really know the effect until I am totally done early this summer and am at the track with my buddy who has a van as well with the factory headliner and no significant insulation….stay tuned. And thank you once again Ken for all your help and replies on IG (I’m the one im’ing from @big_s_racing)
I didn’t scuff my paint either. I’m not saying that as a recommendation, but I was concerned about having thin paint in places I couldn’t see rust forming. I did wipe down the steel with mineral spirits. I also didn’t spray the sliding door or the rear doors for the same reason. Thank you for the update!
2006 white sprinter, roof needs paint repair/repainted, scratched and some rust. Do you think lizard skin would have similar heat transfer results if applied on the outside of the van (van roof)? or would the dark color absorb more heat and negate reduced heat transfer benefits? Does lizard skin come in colors? UV resistant? Maybe I need to do some Lizard Skin research, I’m too lazy.
Tim, I’m not sure of my answer, but I suspect it won’t be effective on the exterior for the reason you stated–heat gain from the dark color would likely be an issue. What color is your van? I’m almost wondering if a vehicle wrap on the roof would be a better route?
Hi. I saw a video of some van dwellers who lived in Canada and only sprayed Lizard skin for insulation. They had know condensation and used propane heater. What do you think? I was thinking is just using the lizard skin before the built-out and nothing else. I will have a heater…but thinking maybe a wood stove. Thoughts?
I can’t imagine the Lizard Skin would be as effective as a good insulation like Thinsulate. I wouldn’t use it by itself, but certainly would in combination with other insulation.
I noticed It seems there is no lizard skin on the ribs. Was that intentional? How are you feeling u dealing with the heat transfer through the ribs? Did I miss it?
Hi Michelle, I am using the factory MB headliner, which uses plastic clips to hold the headliner in place. I taped off the ribs because I was concerned the additional thickness and texture of the Lizard Skin might make it difficult for the headliner to reattach using the clips. If you’re making your own headliner I can’t think of any reason not to spray the ribs.
can u spray the lizard skin with a sprayer (commercial) that can spray 3.5 gallons per minute?
I am unfamiliar with the compressor specs required but I believe Lizard Skin publishes those numbers on its website.
Hi Ken, love your site. Where did you source your closed cell foam padding that goes between your wall panels and tweed from? Recommend a specific brand?
Hi, and thank you! Here’s a copy of my receipt for the closed cell foam: https://live.staticflickr.com/65535/48798996188_8e8c08c08f_z.jpg Take care!
Hi Ken.
This is the best article I’ve read about insulation. Thank you. I just purchased a 2019 cargo 170. I was surprised at how loud it is while driving (almost 80 decibels). I’m planning on doing Noico & Thinsulate, like you have. I know it’ll help some with sound but I’m trying to quantify & measure what the actual result will be. Do you have any data? Also, I value sound dampening just as much, if not more than insulation. Are there other things I can do to achieve this? Thank you!
Hi Nic,
A couple other options for sound control that I’m aware of–Lizard Skin makes a sound control layer that can be sprayed with the ceramic heat barrier layer, and I’ve heard positive results from that. Thinsulate has sound deadening properties but you could also add some closed cell foam within the walls as it’s relatively inexpensive and light. Heavy mass vinyl would reduce sound too but it’s extremely heavy stuff. I hope that helps and thanks for the kind words!
Thanks for this write-up. I also used Lizard Skin, but sprayed on all outside surfaces, including doors, under headliner, and down low (we have an empty van at this point). If you spray the doors, then be quite careful to feel around for the door mechanisms and stuff/tape to protect from over-spray. This prep takes a long time. We used 2 gallons and it was barely enough to coat to the recommend thickness. I would have appreciated maybe 2.25 gallons, but I’m done with this project now.
After being in the van both hot/cold before and after the spray, I’m glad that we took the loooonnng effort to prep and spray. It is definitely more comfortable. We don’t have the rest of our insulation in yet but there is a noticeable difference.
Thanks for reporting back, we are super happy with it as well!
Thanks for this! I ll probably follow this exactly. What are your thoughts on underfloor heating ? for example if i were to run piping in the channels on the floor of the van for example, then fill it with hot water somehow? this would surely stay hot in all that insulation and i could maybe have the end drainable out the back door for when it s eventually cold. Do you think there would be any benefit to something like this?
People have done in-floor radiant heating before. You would need a way to heat the water, circulate it and a way to winterize it as well.
A word on the flaps located in vehicles. They’re not there to circulate air. Their purpose is to alleviate the issue of overpressure (of air) when you close a door. Otherwise, the air resistance would hamper that action. It also prevents the windows from popping out in their frames and other damage from taking hold.
As for moisture and vapor barriers, remember that moisture is resident in our atmosphere, hence the mention of humidity on the 10 o’clock news. When the temperature does down and hits the dew point, the moisture condenses out of the air, giving us that condensation. Prolonged, reoccurring condensation causes mold and rust, as you’ve mentioned. You want to prevent that? Deny atmospheric contact, and thus moisture, with the metal. That means an impermeable, non-breathing barrier. Only one thing will allow that. A sprayed-in, closed cell material. But as you can’t get 100% coverage of the envelope because of structural elements and support braces, you’ll never defeat the problem completely. Uncovered and uninsulated, these elements act as thermal bridges, extending the condensation ‘problem’ into the envelope of the vehicle–the 2x4s in your home construction present us with the same issue. So your conclusions are correct, it’s a difficult issue to solve completely, but sometimes, good enough is good enough.
Ha, that last sentence is the story of my life. Thanks for sharing. Anything semi-permanent, such as sprayed-in foam, makes me nervous for two reasons. One being a future vehicle repair from an ‘incident’ and the other is the fact that every perforation in vans eventually leak, from body-moldings, door handles, hinges, etc. That said, I’m sure it’s quite effective for the reasons you mentioned. Take care and thanks for the comment.
Hey, any thoughts on ceramic insulation like this?
https://www.homedepot.com/p/UniTherm-Ceramic-Fiber-Insulation-Blanket-Roll-8-Density-2300-F-0-5-in-x-24-in-x-60-in-R-5-CF8-5-24×60/309952191?mtc=Shopping-B-F_D26P-G-D26P-26_2_AIR_CIRCULATION_ACCES-Generic-NA-Feed-PLA-NA-NA-EvapCoolers&cm_mmc=Shopping-B-F_D26P-G-D26P-26_2_AIR_CIRCULATION_ACCES-Generic-NA-Feed-PLA-NA-NA-EvapCoolers-71700000052590833-58700005054698689-92700050204976188&gclid=CjwKCAiAzJLzBRAZEiwAmZb0arII4iMMnQLHFgyxr0h9Lin6gmFKb0ie8er0BLJCear96ylP-Z4pIRoCf7EQAvD_BwE&gclsrc=aw.ds
I dunno, I’m not one to want to experiment too heavily with something as important as insulation. But that’s just me!
Yeah I’m really just getting started thinking about these things. Just got a sprinter last week. Appreciate your work very much @ourkaravan!
I was thinking maybe I could layer (I’d have to see if it can peel in layers) that between the sheet metal and thinsulate in some areas. I’m pretty sure this material is used in boiler housings to shield the heat from the cast iron sections, cant really speak on any other applications.
Hi, I’m not sure what you mean by layering but I have the combination of Lizard Skin, butyl mat (noico) and thinsulate all layered in my walls. It seems to work well for both sound dampening as well as thermal insulation.
Hi Ken,
Live your site, so much useful information and so well presented. And doing all of this together and for your daughter just warms my heart, she’ll have these memories with her forever.
Quick question: How mich Thinsulate do I need for my 144 Sprinter?
Thank you and all the best from Berkeley,
Matthias
Hi Matthias,
Thank you I really appreciate the feedback! The rule of thumb is 40-50 lf for a 144 Sprinter. That will cover everything minus the floor. (SM600L is probably too thick for the floor anyway–SM400L might be better for that.). We bought 50 lf and had some leftover.
Thankfully my daughter loves the van as much as I do! I’ll just call that a success story. 🙂
I just finished using 30ft on my Sprinter Crew Van. That covered the back walls (lower/upper), wall ribs/voids, slider, back doors, and the lower section below the crew van driver side window. I’ll order another 10-20 (as Ken mentions a whole van needs ~40-50) to do the ceiling and maybe double up some wall sections.
Ken – Thank you for the great resource by bring all the DIY van conservation info into one place
Hi Scott, sounds about right. I really appreciate the positive feedback; it’s always good to know what is helpful and I’m always open to suggestions on where more information is needed. Thanks again and hope to see you around. -Ken
Hello Ken,
Like many others who love your website, I just wanted to say a big thank you for being so generous to share your knowledge and experiences on your sprinter van conversion. It takes extra time and dedication to write up the info and make really good videos on top of being a parent and taking care of regular life chores. You are definitely an inspiration and one of the reasons why I finally took the leap to get our sprinter van knowing that it’s doable to attempt DIY conversion in stages while still being able to spend time with my kid.
I really didn’t want to trouble you with questions since most of your videos are super easy to follow and I appreciate the good engineering sense. But I thought I ask your advice on the Lizard Skin application since you are one of the fews who documented its usage in a Sprinter van.
1) Your article section seems to suggest that if you had thought of Lizard Skin first, you would have sprayed the Lizard skin first before applying the Noico dampener. Is that what you would recommend I do? Before I came across your site, I was thinking that the dampener would stick better to the original bare metallic surface than a ceramic one.
2) I also read that you already have your floor finished before the Lizard Skin decision. Given that I am just starting my conversion, do you think it’s overkill to spray the van floor with Lizard Skin prior to insulate it with mincell or XPS, and then putting the stock floor back on?
3) I did bought the Lizard Skin sprayer that you recommended but you mentioned that a good compressor is recommended. Do you recall what pressure settings you used for applying it in your van?
Thank you and kind regards,
KP
Thank you KP, messages like this always make my day. Most of my enjoyment from the web comes from my interactions and meeting people like you. And no worries on the questions, I am happy to help when I can.
On the day we sprayed my van, we also sprayed my buddy’s. My van already had Noico installed and we sprayed over it. His van was brand new and we did Lizard Skin first and adhered the Noico to it. Honestly both worked fine and I can’t say one is better than the other. I think I’d go ahead and do the Lizard Skin first to prevent the Noico from absorbing the heat (just a thought).
Regarding the floor, it depends on what your plans are. You might not want to spray if you’re planning to bolt down L-track or other things where it may be desirable to have metal-to-metal contact with the floor. If you do spray be sure to cover up the threads for the D-rings so you don’t fill them with material. Lizard Skin is water based and can be cleaned up with relative ease before it dries. Once it dries it wouldn’t be easy to remove.
Regarding spray pressure, I believe LS recommends 50-70 psi. The pressure is determined by the setting of the nozzle, but we used a pressure on the higher end, 65-70 psi. I hope that helps and good luck! -Ken
Hi Ken,
Thanks for all of the info. Just wondering if you have had any problems with condensation in the headliner after insulating it?
Thanks,
Kris
Zero. I haven’t noticed condensation anywhere in the van, but I am pretty good about cracking the fan to aid in keeping moisture at-bay. -ken
Thank you so much for your wonderful content and for taking the time to answer questions from people like me. I second the wonderful compliments in previous threads. I apologize if my question has been answered in a previous thread but I was wondering the best way to secure the factory floor to the vehicle once the floor has been built up. I put Noico down, mini cell in between the ribs followed by another layer on top, followed by the stock floor (crew). I don’t believe the original bolts for the tiedowns are long enough to feed through. Is there an aftermarket bolt that would thread through or do I need to worry about re-securing it? It’s a 2016 crew with a bench seat. Thanks again!
Hi Erik, I appreciate the kind words. I elevated my floor about 5/8″ to bring it up to the height of my sliding seat rails. I purchased longer bolts from the hardware store so the factory floor could be bolted-down just as it was from the factory. The factory bolts are M8x1.25, in varying lengths. I’d recommend taking the ones you have and purchasing longer ones from the hardware store. I found that Ace Hardware has a good selection of metric bolts. Thanks and take care! -Ken
As a building contractor for 50+ years, it was so refreshing to read your opinion concerning the use of a vapor barrier in a van. I have debated this issue to many times to count ….Your workmanship, patients and organizational skills are highly commended ..
Thank you Ray, I always appreciate the vote of confidence! -Ken
Thank you for such in depth reviews and videos on “how to” undertake projects correctly….now you do owe me a few hours of missed sleep as I can usually be found propped up in bed watching your YouTube video as until all hours of the morning 😉
Just ordered the Noico and 3M based on your recommendation for my 170 xtend Moto Van build, which brings me to a quick question. For the Noico, install, did you go overtop any factory installed butle sheets, or did you remove, lean and install Noico fresh? If so, did you find any measurable difference with the two methods? Better, worse or the same.
Hi Chris, you are welcome…I’m guessing many of these videos would be very useful at putting one back to sleep.
The factory butyl is very effective, so I left it. I wouldn’t recommend adding any over the top. If you feel you desire more, simply apply more around the existing butyl. The panels sound considerably less “tinny” with the butyl in place. The Thinsulate takes care of the rest. Good luck! -Ken
Thanks so much for this amazing resource. I’m starting my conversion now. Would you recommend applying Lizard Skin before or after installing the roof vent? Before or after sound dampening?
Hi, I would apply the Lizard Skin before installing the fan, so you don’t have to go to the effort of taping it off.
I don’t have a strong opinion on whether it’s better to spray the Lizard Skin before or after the sound dampening….we sprayed two vans in one day–my van already had the sound dampening up so I sprayed over it. In the other van (which was bare), we sprayed Lizard Skin and adhered the sound deadening to it. Both worked equally well.
I hope that helps! -Ken
Thank you for your video series! I wondered if you documented your install of Noico panels. I see that the Thinsulate video is #2, but I can’t seem to find a #1. You showed a few clips, but the whole video alludes me. A link please?
Hi, the first insulation video is here: https://www.youtube.com/watch?v=jkyPNK6uS1g If any questions remain feel free to reach out! -Ken
What an amazing site and videos, Ken!
I’m in Colorado where we have both cold and heat to deal with. Typically we’re heading up the cooler mountains but certainly see adventures to the western side of the state and beyond where 100 degree days aren’t uncommon. Would you say that LizardSkin is overkill for Colorado?
On a related note, if you install LizardSkin do simply mask all your factory holes so you can use plusnuts throughout the install later? Do you have to worry about that? My plan is NEVER to drill a hole given the rust concern that seems to be a nightmare for campervan folks.
Overkill? No. I consider LizardSkin as a way to further reduce the time it takes for the heat/cold to spread to the interior, but the Thinsulate is the main source of insulating. They have different jobs as the LizardSkin attempts to prevent the heat/cold from hitting the interior in the first place, but that’s inevitable. If you can do it with a reasonable amount of effort and cost, I think it’s worth it, but not at some of the $2,000+ prices I’ve seen quoted. -Ken
Love your show!!! So very helpful brotha!! Thank you!
Why thank you!
Hi Ken,
Great videos! What product did you use to cover (insulate) the wheel wells? Thanks,
Dean
Hi Dean,
A combination of Noico butyl mat and thinsulate works to dampen noise and insulate. Lots of noise comes through an un-insulated wheel well. Thank you for the kind words! -ken
I have already applied Noico butyl sound deadening over most of the walls and ceiling of my van build. Wondering if it makes sense to spray Lizard skin over the Noico? Thanks for your thoughts.
Oops! See that you answered that question already. Thanks for your great content!
No worries; good luck with insulating. -Ken
Very interesting info on the Lizard Skin and now considering it. Also trying to watch weight of everything. Do you know how much weight it added?
In the overall scheme of things the amount of added weight is negligible. I used under 2 gallons, so the weight could be estimated by Lizard Skin’s product shipping weight. -Ken