


Why Blum Drawer Boxes?
We chose these drawer boxes for their high quality, ease of assembly and wide range of adjustability. Because most vans are going to have odd-sized drawers, this kit will allow you to easily create a drawer of any size. For the less-precise van builder, these drawers also allow you to adjust the drawer face up and down, side to side, or tilt it in order to allow for perfect drawer alignment. I can’t stress how much this aids in creating a very professional end-product.
Drawer Kit Components
This kit has four or five components, shown in the photo below. Component (1) is the “cabinet profile” or drawer slides with integrated soft-close. Component (2) is the “drawer profile,” or the drawer box. Part (3) is the optional “gallery rod” that can be used in deep drawers. These extend the height of the side of the drawers while maintaining the ability for the fine-tune adjustment of the drawer front. Only our bottom two deeper drawers utilize gallery rods. Components (4) and (5) are rear and front “fixing brackets,” respectively, to attach the drawer front and back to the drawer box.
Note: This site contains affiliate links for which I may be compensated.


Before we dive-in, you may want to watch our YouTube video as a project overview.
Building the Drawer Bottoms
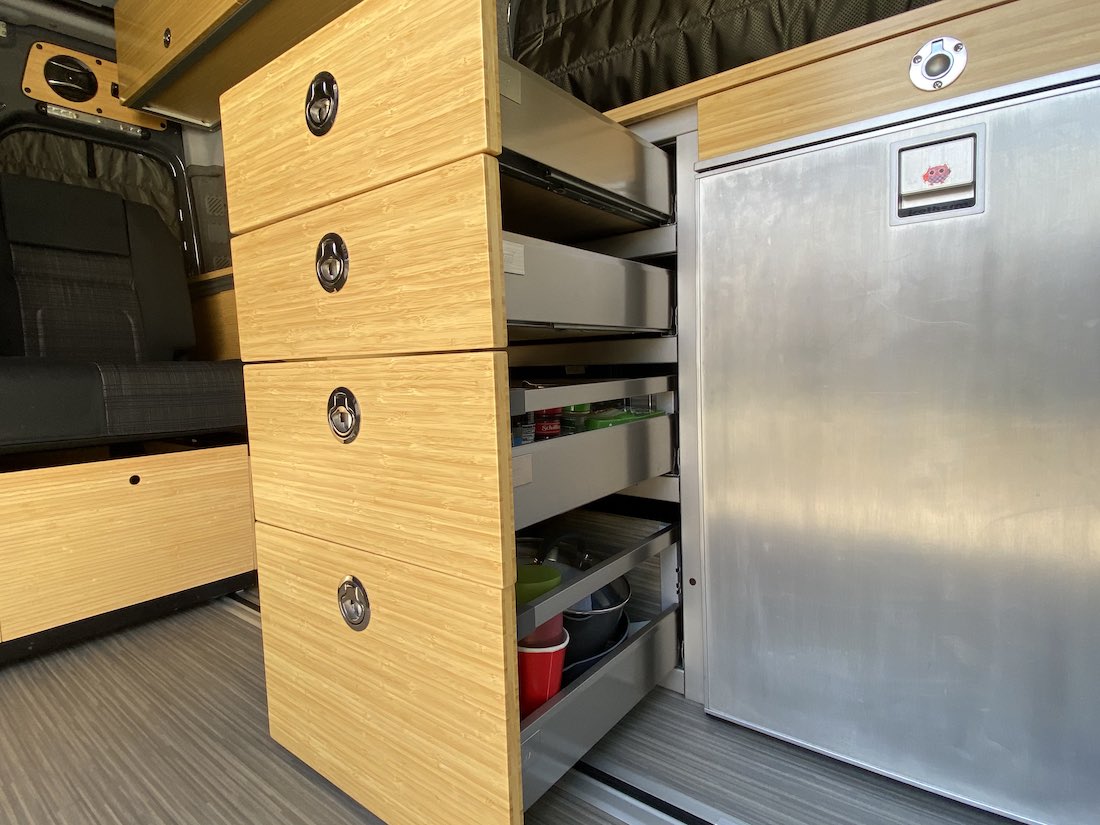
As a frame of reference, the measurements below show the spacing of our drawer laterals. This determines the depth of the drawers.

Keep in mind, all of the drawers will use the same bottoms. To create the drawer bottom we need to measure the width of our drawer opening. If you’re using our OurKaravan galley, that measurement is 15-inches. Take that dimension and subtract a fixed 2-15/16 inches, which comes out to 12-1/16 inches. This is how wide you cut your plywood.
The length of the drawer bottom is the cabinet profile length (in the case of a 22 inch box, the actual length is 21-5/8 inches per Blum), subtract a fixed 15/16 inches, which comes out to 20-11/16 inches. This is the length of your drawer bottom. In the case of our galley, all four bottoms would be cut to the exact same dimension. (12-1/16″ x 20-11/16″) Only the drawer backs differ, and when combined with the gallery rod, create the depth of the drawer.
Building the Drawer Backs
All drawers will use the same dimension for the WIDTH of the drawer back. Take the inside cabinet width and subtract 3-7/16 inches. In this case, 15 inches minus 3-7/16 inches is 11-9/16 inches. All four (in our case) drawer backs will be 11-9/16 inches wide.


Hello,
Will you build me a set of drawers? I am buying a overland trailer and need to have five Zarges boxes in pull out of a frame. The K9 AluBox Mount is a quick disconnect that I would like to add to the sliding drawers.
Hi, I appreciate the offer but unfortunately I’m pretty tied up with work at the moment. The Blum drawer boxes are pretty straight-forward to assemble if you’re willing to give it a go. -Ken
Hey Ken!
One question if I may:
Above you mention “the galley is 22″ deep and thus 22″ drawers can be used.”
However, in your 80/20 3D Sketchup model, the galley is 20″ deep, and in your Van Drawers video, you mention actually using 18″ slides because you don’t have quite the depth to use 20″ slides.
I am in the process of building my galley and I am a bit confused by the information.
Thank you for all the great content btw 🙂
You have that correct, my galley is 20″ deep because I needed room for my sliding second row seat to be able to fit between the galley and the side of the van. I also have electrical distribution panels behind my gallery drawers, which means I don’t have the full depth available to me.
The pre-cut galley is 22″ deep and as long as you have nothing mounted to the van wall directly behind the drawers, you can use the 22″ length. You can also shorten the cut for the drawer bottom to whatever you like but there is room for a 22″ drawer on the pre-cut galley. -Ken
Excellent stuff, as always 🙂 Cheers!
I’m having trouble finding a link to where you purchased or how you built the drawer fronts. The video linked shows how to mount the drawers but not where they are from, the video mentions checking out your store but I don’t see them there either LOL – can you help? How did you make/buy the drawer fronts?
Hi Jaime, correct, this article is how to build drawers. If you look in the “parts required” section of this article you’ll find links to buy them.
I don’t have a write-up yet on making the drawer fronts, but I do have a video on it: https://www.youtube.com/watch?v=_RccPYPiTkE
I hope that helps!
Ken
Hi Ken,
As always, thank you for taking time to put this together and for sharing this! I have a question if you happen to have time to answer. Since the stainless steel Tandembox drawer profile has been discontinued, do you think I would be able to go with the Legrabox profile which comes with the stainless steel version and still stay within the drawer measurements above? But I understand that the Legrabox won’t have the gallery rod look and feel which I do like.
Cheers,
KP
Hi KP, I looked it up and it looks similar in design. I haven’t built one but I see it as a viable option. The SS is very nice. -Ken
All Tandembox is discontinued.
EB Bradley (wholesale only but they will direct you to a local supplier) suggested switching to Legrabox. Unfortunately drawer bottom requires a rabbet joint which is beyond our skill level. If you are going this direction, EB Bradley has kits in their catalog for easy ordering.
https://ad.wpcappserve.com/cust/ebbradley/pdf/catalog/2018/EBB_Vol25_Catalog_S02_Drawer_Slides_&_Box_Systems.pdf
pages 185-191
Metabox seems insubstantial but may use as these drawers won’t be heavily loaded.
They still manufacture Tandembox, just not in stainless. See my article and links here: https://ourkaravan.com/building-drawers/
Hello! Concerning the 8020 running across the front of the drawer opening, in between each cabinet – are those necessary? Do they support some weight of the drawer, or just cosmetic? Thank you!
Hi, the main purpose is to provide a place to mount the catch for the slam latches. Without these cross bars the drawer has no way to lock in the closed position.
I note that in your vertical stack-up of drawers and cross bars there are 5 cross bars. They total 7.5 inch of vertical, unusable space. Thats approaching 25% of the total stack-up. Is the loose of one drawer of storage capacity worth the gain of those snazzy latches you have sourced? Admittedly I have the benefit of hind site gained by reviewing your excellent material so please take no offense as none is intended. I ask your opinion of utilizing an alternative design; a latch that engages on the side, eliminating the horizontal runners in the front. and adding intermediate vertical members along the sides to obtain 4 mounting points for each slide. My installation is in a trailer with an OEM supplied metal counter that is very robust as is the floor. In addition I would enclose the sides and back side of the cabinet with panels to gain shear strength, to help prevent racking, and for dust control. Do you see any reason why this approach would not work?
Again, thanks for putting together this information. It is very helpful and the presentation topnotch!
Hi Peter,
Thank you for the kind words. The top and bottom cross bars are necessary to join the structure. However you’re correct that there are three cross bars (total of 4.5″) where there’s room for a gain in space efficiency. I could have used half profiles in these locations however it adds yet another profile type to the construction and you would be required to use anchor fasteners as there would be no slot to hide angle brackets. I’ve tried using magnets to hold drawers closed, which is not a good solution–so slam latches are all that I would use. You could probably put a slam latch on one side of the drawer to eliminate three cross bars, but the aesthetic may not be pleasing. Let us know what you come up with! -Ken
Do you have the dimensions for the drawer faces? I purchased your kit from Heitek Automation and am trying to build to your dimensions.
Thank you.
Hi, I can provide any dimension you like, just know it would likely be easier to measure off your galley and decide exactly how much gap you want between each drawer and cabinet door. Any slight variation in, say, the mounting of the hinge on the cabinet door, would result in an unaccounted-for gap somewhere else. My contact info is on this site if you’d like more info, I’m always happy to help. -Ken
Ken,
Thank you so much for your videos. My drawers are turning out perfect.
Barb
Thank you, I appreciate the feedback! We love ours. -Ken
I love those floors. Where did you get them?
I purchased it from a local Carpet One near me. It’s Earthscapes brand, Pajero 591 style. I love it. -Ken
Hi Ken!
I want to build your exact drawers but when I click on the Amazon link it says the Blum products are unavailable.. any recommendations on a different brand or thoughts on Blums new under mount drawer design? Thanks!
Carissa Rasmussen
Hi Carissa, with all of the supply chain problems these go in and out of stock regularly, as do a lot of other products. You might search the web and see if another vendor has them in stock. It pretty much changes by the day. Take care! -Ken
Started this weekend! Thanks for taking the time to answer my emails. We cut out the drawer bottoms and backs this afternoon with a skill-saw. Not perfect and hoping that our little mistakes aren’t big ones.
Waiting for the Blum drawers to come in.
My van was built with caveman tools so it can be done. Congrats on completing that project! -Ken
Where did you order the bamboo faces and door?
I purchased the bamboo from both Hughes Hardwoods in Rancho Cordova, CA and Auburn Hardwoods in Auburn, CA. Neither store had any trouble ordering it, so based on that I would think most good hardwood stores could obtain it for you.
Hi there, Much of the hardware you link to is no longer available. I’m ordering your pre-fab galley through hietek so I want to make sure I order the correct hardware that will be compatible. Any way to update your links with the current Blum products available? I’d be happy to use your Amazon Associate links… Thank you!
Thanks, Ken! I greatly appreciate this resource you’ve created!
Stella, links have been updated, thanks for letting me know! -Ken
Hey Ken,
How the heck did you attach the catches for the slam latch to the 8020?
Tap threads and use little bolts? I can’t figure it out. Thansk! – Henry
Hi Henry, check out this video for details: https://www.youtube.com/watch?v=Kqhg02EIHNc
-Ken
Thanks Ken, I watched the video. I am shooting for inset drawer faces which makes the dimensions for catch install
a hard lift; I got a deeper button and the catch/latch fits like a glove. Thanks!
Awesome, thanks for reporting back! -Ken
Much appreciation for your willingness to share your hard work, research, and details from your van build- it has simplified my own build significantly. I noticed while watching the Youtube video for these drawer boxes, that it appeared you were using a ratcheting allen wrench. Could you share a model number or a link to where I could order one? Thanks again for the ideas, details, and inspiration from your beautiful build!
Hi Jason, I don’t have any ratcheting Allen wrenches but I do have a Craftsman Allen socket set that works with a 3/8″ standard ratchet. Thank you for your kind words! -Ken
Hi Ken,
I’ve noticed the Blum drawer profiles seem to be out of stock and discontinued at this point as far as I can tell. Any idea where to find some or a good alternative? Thanks!
Hi Tyler, as far as I can tell, this is temporary. It looks like most everything is back in stock now. -Ken