

Background
L-track, also known as logistical track, is a versatile tie down system of aluminum rails and fittings to secure cargo. It is used in aircraft to restrain cargo or seats, and is also widely used in the ground transportation industry. There are a variety of fittings that make them perfect for use in a van. We have L-track installed along the length of one wall and on both rear doors to hold gear. We will show you the proper way to install L-track in your van.
Choosing the Right L-Track
L-track comes in several grades. Some L-track is Federal Aviation Administration (FAA) certified for use in aircraft. Some are Department of Transportation (DOT) approved for use in passenger vehicles to act as seat or wheelchair restraints. The L-track we are using are not FAA or DOT approved. The sole purpose of ours is to restrain gear inside in our van.
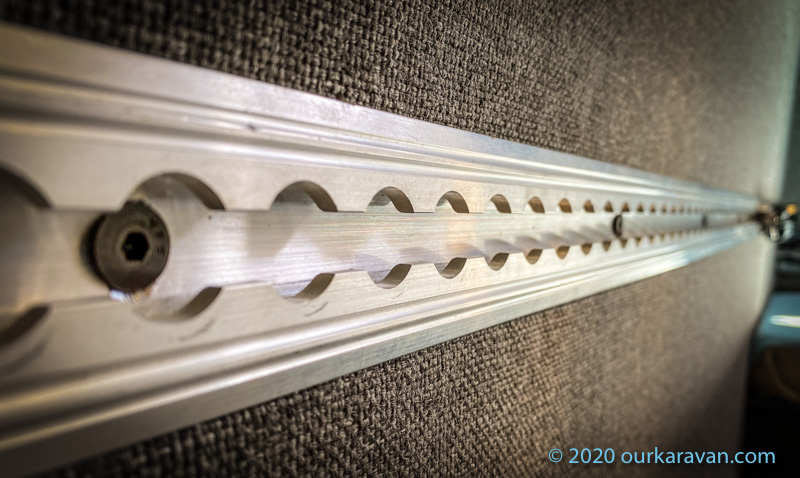
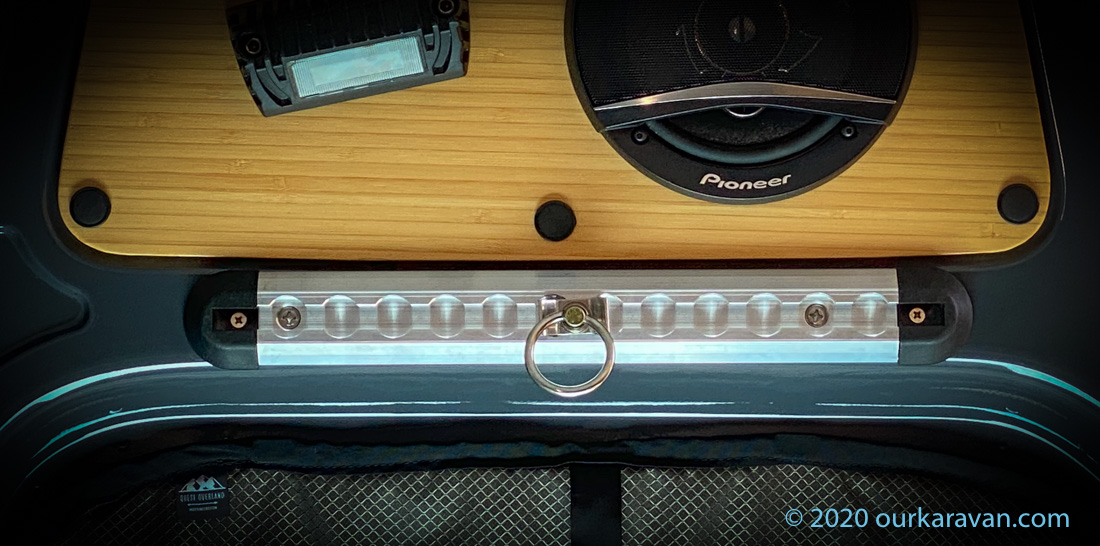
Beyond the ratings, L-track comes in several different styles. There is standard L-track, flanged, and angled L-track. We used flanged L-track on our passenger-side as the wall panel neatly tucks behind the flange as seen above. It can also work well recessed into a floor. Angled L-track looks nice when surface-mounted, and was our first choice for use on both rear doors of the van. Choose what style works best for your application.
Note: This site contains affiliate links for which I may be compensated.

L-track and Mounting Hardware


In our final step, line up the end cap with the L-track and mark the single-screw mounting hole. You will now drill a small hole and use a sheetmetal screw to hold the end cap in place.
Purchasing L-track
We recommend two places for purchasing L-Track and attachments. One is US Cargo Control and the other is Amazon. While we do make a small commission from Amazon purchases, we always encourage people to shop around for the best deal. For the 12″ L-track, end caps and screws we went with US Cargo Control. (We are not in any way affiliated or sponsored by them.) For the longer section of L-Track the free Amazon Prime shipping may make it cheaper.
Our door-mounted L-track is used to hold a propane hot water when we are taking showers. Thanks for following along and good luck with your build!
I ordered the rivnut tool and rivnuts from your link. It seems the mandrel is too short. Is there a way to adjust it so it will work?
Are you installing the plusnuts into sheetmetal or something thicker? Unless they shipped the wrong one it should work. Can you describe what you’re experiencing?
Hi Ken,
We had the same issue as Michael… The rivnuts you used don’t fit with that red rivnut tool. Like he said above they are too long to thread. Only the ones that they ship with the tool which don’t seem nearly as strong. I thought i found that hand tool in eBay in one of your links but now I can’t find it. Any support you can offer would be great. Thanks!
Thanks for letting me know…I’ll pull the plusnut tool off the page. What solution have you found to set them? The first set of plus nuts I bought came with a little spacer tool to set them. Those don’t seem to be available any longer. -Ken
What type of drill bit did you use for the L-Track? Did you do it with a hand drill? If so, how did you keep it straight? Thanks .
Hi Ray,
I used standard drill bits, nothing special. If you’re looking to install longer sections that are not pre-drilled and countersunk, you can watch this video I did a couple of years ago: https://www.youtube.com/watch?v=kGw0KxQvdX0
The photo that has L-Track and Mounting Hardware had the L-Track and hardware on grey coin shaped coated plywood. Do you have a product source for that plywood?
Hi Jason,
This is a product I adhered directly to plywood. Full video here: https://www.youtube.com/watch?v=YmfWGvHsDjI
Take care! -Ken
Hi! Do you have a diagram of where the holes are to install L strict to a 2017 Mercedes Sprinter Wall? We have some tracks up but want to install more but birch wood is up and I have no idea where holes are located for rivnuts.
Hi, the L-track can be installed pretty much anywhere you need it, as long as it can sit flat against the body.
Hello
First of all thank you for the very informative post on installing L track. Very helpful.
It appears that US Cargo is out of the 12″ pieces until 2022. Do you have an alternate source you can recommend? Or how about buying a longer piece and just cutting it?
Thank you and happy holidays
Mark
Amazon has some 12″ US Cargo track in stock–it’s showing a Dec 1-3 delivery date at my home. https://amzn.to/3nLrrQm
Happy Holidays to you as well!
Very nice tutorial, thanks!
Do the panels sit under the lip of the L track?
Thanks
Yes, the L-track holds the upper portion of the lower wall panel and also retains the lower portion of the upper panel with no fasteners.