

Van Electrical System Planning
Building on the “Layout Planning” article we wrote, another important consideration you should make early-on is the type/complexity of van build you desire. If you only need a basic bed, some LED lights and an ice chest, you will not have much in the way of electrical system planning. You could order your van with a factory Auxiliary battery, add some fuses and switches and you’ve got light. When you start adding electrical refrigeration, charging ports, heating systems, etc., you will likely need more battery storage, more wiring and a way to charge it. Let’s dive into the planning aspect of your van electrical system.
If you have a family, we highly recommend sitting down with everyone in your family and getting some ideas on what people want to make their travels comfortable. This will be a fun way to get your project started and get everyone excited about the good times you will share together. Once you start adding up costs, it will be pretty easily to explain why the clothes dryer and hot tub didn’t make the final list.
Our Electrical Wish List Looked Something Like This:
- Refrigeration
- LED lighting
- Vent fan
- Air heating system
- Electric water pump for sink
- Charging points
- 120V power for electric kettle use
Calculating Power Consumption
With that done, now you want to get an idea what the power consumption of these items will be. It’s not important to know the *exact* product you will be using in your van, but you need at least a rough estimate. For the first item on the list, the refrigerator, we looked up the specs for a small 1.7 cubic foot Dometic CRX50 fridge. It is rated at 1.4 amp-hours per hour (aH/hr) at 77-degrees Fahrenheit (F) (a typical standard ISO baseline temperature). 1.4 x 24 hours = 34 amp hours. Our larger 4.6 cubic foot Isotherm Cruise 130 has a rating of 400 watts per 24 hours at 77-degrees F. 400 watts / 12 volts = 33.3 amp-hours over 24 hours, essentially the same as the smaller Dometic. Many fridges use the same Danfoss compressor, hence the similar consumption.
This gives us a rough estimate for the smallest and largest fridge we are considering. The refrigerator will be our largest single consumer. We did the same rough calculation for some random overhead LED lights, the Maxxair vent fan and other items shown on the list below.
It’s Just an Estimate, Folks
Don’t sweat the details here too much. This exercise will provide us a rough estimate of the battery capacity we will require. This will help determine the relative complexity of the wiring. Our estimates tell us that roughly 56 amp hours per day in moderate weather would be a conservative daily consumption. If it’s warmer than 77-degrees, refrigerator and fan use will go up, but diesel heating needs will drop to zero. Remember, this is intended to be a conservative assumption. Our factory Mercedes-Benz Auxiliary battery is only 95 amp hours (only 50% usable for long life, so ~50 amp hours), so we needed more battery storage if we want more than one day off-grid (with no other sources of charging). To get enough storage for 3 days off-grid (without any other charging), we would need 150 usable amp-hours.

Electrical Distribution and Planning
Now we have a good idea what we are getting ourselves in to. You want more than anything to focus your time on making your van look amazing, and somehow stringing up wiring and setting distribution boxes just doesn’t scratch that itch. It will end up being one of the most important parts of your van build. If you think it-through, you won’t have to tear your van apart in the future to add things you later decide you need.
Electrical Hardware are Space Hoarders
You may be trying to figure out why this is important now. When planning your van, unfortunately, you have to consider where all of the electrical systems that run your van will be located. These things take up space, and space is very valuable in a small van.
Sometimes It’s the Little Things
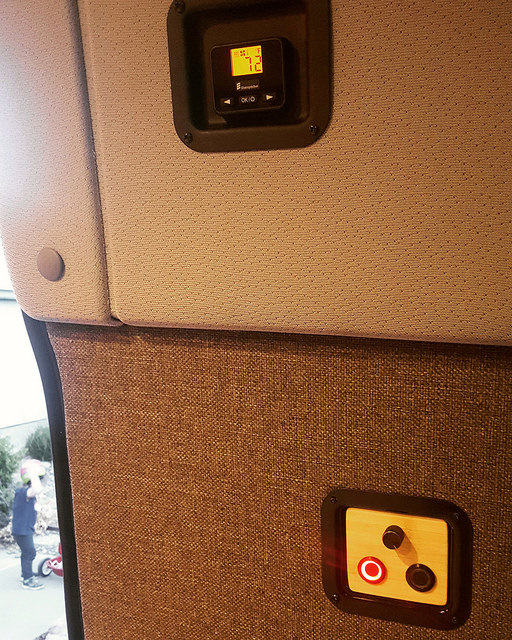
You also want to think about serviceability and how you will control these systems. Take the photo below as an example. We wanted the overhead light dimmer switch to be within reach of the bed. However, that makes turning on the light upon entry difficult. We would have to get in the van and find our way to the switch in the dark, so we made the decision to include a second switch right at the sliding door entry so we can turn the lighting on and off without having to climb up into the van.
It’s little things like this that make a van feel well thought-out. While you do not need to go to this extent, you do need to think about where you will place the components and controls. You need the wiring in-place before you cover up the walls with cabinets and wall panels.
Tips for Electrical Planning
Now is a good time to bust out the Post-It notes and blue painter’s tape. Label the van walls for locations of switches, thermostats and electrical distribution boxes. It will help you later when you’re building your wall panels to know where cut-outs need to go and will help you select the right products. There are a lot of places in the van where there is not sufficient depth between the wall panel and the skin of the van to place a standard 1-1/2″ deep switch. You will want to examine these scenarios before you order all of your parts.
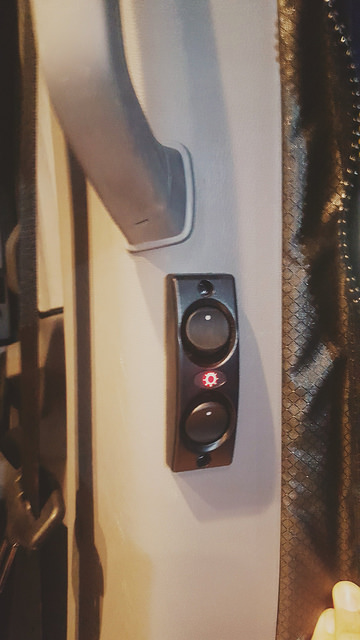
Refer to the photo below. On the passenger’s side (left side of photo) you see mostly speaker wires for the rear door speakers. Coming down from the ceiling are the wires from the solar panel. Hanging out of the rear doors is wiring for both speakers and LED scene lights. There is also wiring for the vent fan and the factory interior lights, which we maintained in operating condition. A wiring bundle goes under the floor for power distribution on the other side of the van. Finally, there are wiring runs you can’t see that power switches, lights and accessories. The photo below shows what the inside of our van looked like prior to tidying-up the wiring and prior to putting the wall panels on.
Thanks for all of your work compiling this information. On your light switch/thermostats. Where did you get the black recessed trim pieces?
Thank you, and you’re welcome! The black trim pieces are made by Penn-Elcom and they are called recessed dishes, of all things. I have purchased from both Amazon as well as parts-express.
Thank you for all you have done Ken , I have one question what are the wiring sizes for the various components ?
Hi, I printed most of the wire gauges on the wiring diagram. For heavier loads like the fridge and diesel heater I used AWG 12, for medium loads like the fan and water pump I used AWG 14 and for lighter loads like wiring and charge ports I used AWG 16. I hope that helps.
Thanks is there a real disadvantage to go to a larger gauge for a given load ?
Cost of the wire and lugs, weight and the inability to bend around objects are the only ones I can think of.
Ken, I really appreciate all the great work you have done, both on your van and on your website and Youtube channel. And thanks for sharing–I can only hope my build will be half as impressive as yours!
Given that I also have a 4 cylinder 2016 Sprinter (albeit a 170WB passenger van), I had a question about battery placement that I have been contemplating, especially because of the potential space saving.
Since vans that are bought without the auxiliary battery have a significant space under the hood that would accommodate 2 6-volt batteries (that could be wired in series), do you see any downside to putting the leisure batteries in this space, rather than in the coach? I was hoping to put the fuse box in an upper cabinet directly behind the drivers’ seat. I have seen a few links that discuss this, although it is unclear to me how easy it would be to wire. Here are a couple:
https://adventurewagon.com/collections/electrical/products/battery-tray-w-wiring-bundle (The install video is here: https://www.youtube.com/watch?v=NRrpgXZtPTk&t=8s)
http://livelikepete.com/dual-6-volt-underhood-battery-tray-sprinter-van/
Whaddya think?
Under-hood is a great place for batteries. I’m a fan of taking up as little interior space as possible for mechanicals. There is one downside though–if you ever decide to go with lithium batteries, you won’t want those under-hood due to the heat. It would also mean moving all of your house electrical from under-hood to inside the van. Just something to think about.
Thank you for the kinds words, always appreciated!
Thanks for the affirming response–I think I will go with this idea.One other question, if I may:
I think you preferred to wire all of your DC system with fairly thick wire (12 and 14 AWG, as per one of your responses above), irrespective of how much amperage a given load would need. I suspect it is easier to take a lowest common denominator approach, using just one wire gauge that would cover every possible usage. However, I have seen some wiring (including the Mercedes OEM wiring) to be fairly lightweight for LED lighting, 12V sockets, and USB ports–16AWG, even 18AWG.
So for example, the portable fridge I want to include in my build uses an average of 2.7Amps in a 12V system (https://uniqueappliances.com/product/unique-2-8-cu-ft-portable-ac-dc-powered-freezer-fridge-80-l-w/), could I not use a 16AWG wire if it was dedicated only to this appliance? What reference did you use when selecting AWG 12 for your medium loads, and how did you define a “medium” or a “light” load?
Hi Mark, great questions. In some cases my wiring is oversized, either because I wanted to account for things I may add to the van later, or because I wanted to avoid buying multiple rolls of expensive marine wire in different wire gauges. Generally I would say that AWG 14 is sufficient for most any DC appliance not including such things as water heaters, and AWG 16-18 just fine for device charging and LED lighting. But what how about when USB 3.0 is replaced by PD connectors or some other port with much higher draw? Just wanted to make sure I future proofed as much as possible. There’s no disadvantage to using larger gauge wire other than additional cost and a small amount of weight. -Ken
Mark, Bluesea systems has a wiring size App calculator for DC wiring. It calculates both ampacity and voltage drop requirements for the load under question. While it is meant for marine use it is directly applicable for RV builds.
Hey! Thank you for all these great articles and videos. They are sooooo helpful!
I’m wondering where you got the amp by fan speed info for the MaxxFan? All I see in the specs is 5amps which I assume is the max draw. But 2.8amps for the speed “10” and 5amps is a big difference!
Thank you!
Hi Vanessa, I can’t remember where I found it, but most devices have some overhead between the max draw and the fuse size so-as to not blow the fuse in normal operation. I’m guessing when the motor is lifting the hood up and the fan is spinning up that it will pull slightly more than 2.8 amps.
Thank you for stopping in and hope to see you back! -Ken
FWIW, Max amp draw during MaxxAir 7000 Deluxe start was mentioned as: “Up To 9 amps” due to lid operation while fan ramps up. While running it is low as you stated: between 2-6 amps depending on speed setting.
Fuse and wire gauge go hand in hand and length of run goes with max load for proper wire gauge size.
I’m with you. Use heavier gauge wire where possible to future-proof.
What fuse size did you use?
I’m grateful for the effort you put in to your site and videos. It inspired me to build my own van!
Hi Dean,
I am using a 10 amp fuse to account for the startup and hood lift operation. Thank you for the kind words, good luck on your van!! -Ken
Hey! Great work and ideas
Im trying to find the light switches and control that you have installed in your setup.
Can you provide some info how to source that?
Thank You!
Hi, can you expand on which switch setup in the van? B-pillar, the ones behind the sliding door or the ones on the D-pillar near the rear doors…
The black double switch near the entry
Thank you!
It’s a Marinco Contour double switch. Looks like it’s not available on Amazon right now but you may be able to find it online at a marine retailer.
Are these switches 3-way circuit? I mean that you can turn the light on the entry side and turn it of on the bed side
Hi Peter,
To explain, when the lighting is on at night, the dimmer is located near my bed and I use it to turn the lights off when I go to sleep. In the morning I use it to turn the lighting on from bed. The rest of the time the master switch on the B pillar is used to turn the lighting on and off, and it’s easily accessible from the van when standing outside. -Ken
Peter,
I don’t think I saw what you decided on for a shore power connection. I see some using standard 15amp 120V plug like NOCO. My motorhome uses a 30amp plug for when that is an option like campgrounds etc. I use a simple 15-30amp adapter when I only have a standard plug option. Is a 30amp RV style female connection overkill?
Hello
What is the estimated cost you put into that Electric system?
My complete cost for the electrical system was $5,600. That includes every piece of wire, every wire lug, and every single switch or component that could be categorized as an electrical component.
Thank you so much for sharing your wisdom and process and all the details. It is an incredible help to us that are just beginning. I’m curious which refrigerator you ended up going with for your family? We are a family of 5 and are considering the Isotherm 65 or 85.
Hi Aaron, we are using the Isotherm Cruise 130 EL. It’s too big for 2-3 day trips but we really appreciate it when loading up for over a week. Thank you for the kind words! -Ken
Fantastic information here. One thing I’ve been wrestling with is why people build a dual power system in vans rather than using 120v AC (US) system only. Most builds have both 12v DC and 120v AC. I know the batteries store electricity in DC and not AC, and I understand there are inverter losses pulling electricity out of batteries to run AC equipment. But DC wiring is much thicker and heavier, and there are so many more technology options with AC, that I’m wondering if there are trade-offs I’m just not considering. Thoughts are appreciated!
Your observation about decreasing wire size with increasing voltage is correct. However most consumers in the van are 12VDC, such as the vent fan, USB ports, lighting, water pump, etc. Most of the time my inverter is off, unless I’m using my induction cooktop or using the electric tea kettle. -Ken