How to Detail (Wash and Wax) a Van or RV
How to Detail (Wash and Wax) a Van or RV

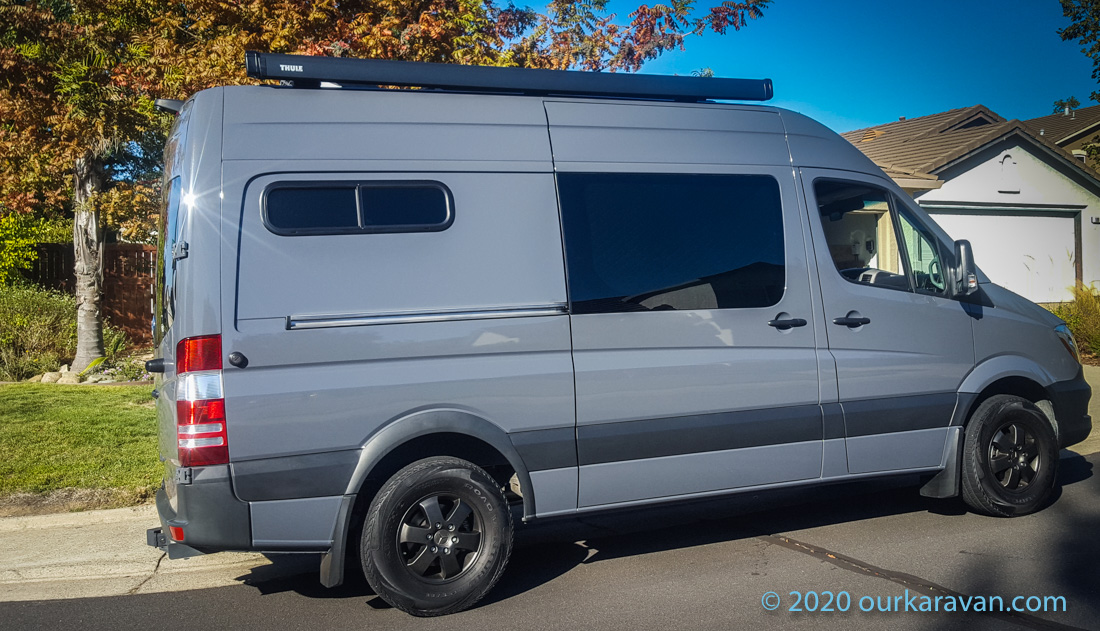
In this article we will discuss the best way we have found to wash and wax (detail) a large vehicle, such as a van or RV. Vehicles are pricey, and a once-a-year paint protection regime can significantly prolong the life of your vehicle’s paint. If you want to watch an excellent detailer in action, check out Ammo NYC’s detailing channel. However the techniques you use on a small exotic car will be different than what you can reasonably do on a large vehicle. We think the methods described below combines the best car detailing concepts to your oversized van or RV.

Car Washing 101
When you wash your vehicle you are removing the relatively large dirt, dust and grime particles that are visible to the naked eye. During this process the dirt particles are being picked up and trapped in your wash mit. As you continue around the vehicle those particles scratch the paint and cause swirl marks. A good detailer touches a car as little as possible. Professional car detailers use pressure washers for this reason, but also because they save a lot of time.
In addition, soap and water are not enough to remove microscopic contaminants from the paint such as tree sap, bug guts, industrial fallout, brake dust and water spots. Let’s get started with a proven process for removing these contaminants without scratching the paint. Finally we will add a seasonal protective wax/sealant coating to the paint.
Note: This site contains affiliate links for which I may be compensated.
Recommended Supplies:
Tools required:
- Hose & Water Supply
- Sturdy Ladder
Optional:
Getting Started – Vehicle Wash using the Pressure Washer
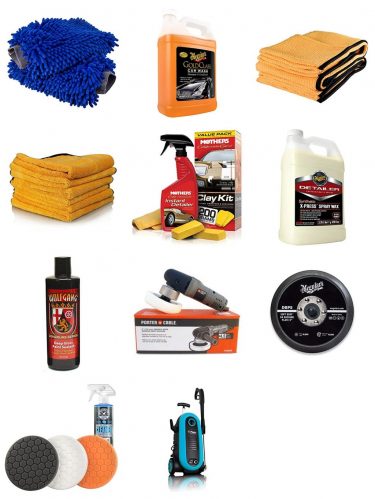
Pressure washing is the best way to remove the surface contaminants from your paint without causing scratches and swirls. It also saves a lot of time, particularly on a large vehicle. We use an electric pressure washer. We chose this particular model because it uses a brushless induction motor. These motors are more powerful, quieter and longer-lasting than brushed electric motors. It is far quieter than gas and the 2,200 psi rating is about perfect for car detailing. When you release the trigger, the electric motor stops, unlike a gas-powered unit that continues to make noise.
Safety first, use a good study ladder. Begin by rinsing the roof of the vehicle. We use the included 25-degree spray nozzle when washing. Spray the vehicle top to bottom, keeping the tip of the spray gun at least 18 inches from the paint. (And even further away if using a more powerful pressure washer.)

Foam it Up
With the entire vehicle including the wheels sprayed-down, release the 25-degree tip and replace with the foam cannon. (The foam cannon was included with our pressure washer, but they are available separately.) Add a good pH-neutral car washing soap to the container. We use Meguiar’s Gold Class Car Wash. For our van, we fill the container about 1/3 to 1/2 full of soap, and the remainder of the container with hot water.
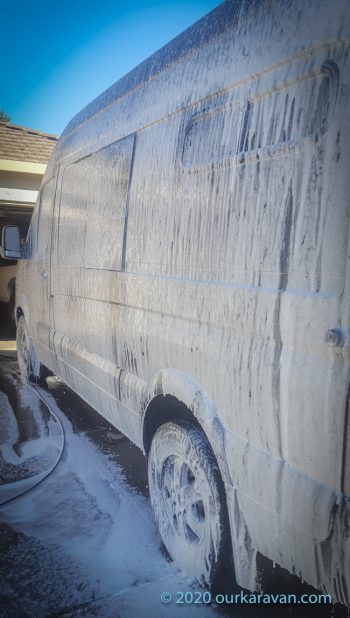
This part is fun. Blast the entire roof of the vehicle until it’s covered in a thick froth of soap foam. On a small car you might foam the entire car at once, but that doesn’t work on a large vehicle. We work one side at a time. For example, we start with the roof, move to the passenger side, then the front/hood, then the driver’s side, then the rear.
Lightly Agitate with a Wash Mit
Now fill a bucket with warm water and more car washing soap. You can go crazy and use a grit guard in the bottom of your wash bucket, if you wish. (We do not, but probably should.) Using a soft microfiber wash mit, apply light pressure and use side-to-side motion to wash the entire roof area.
The purpose of the soap is to release the contaminants, but mostly to lubricate the paint. In all my years of car washing I always skimped on soap, not realizing how important it was to prevent scratching.
Rinse Time
With the roof of the vehicle lightly wiped down, release the foam cannon and reinstall the 25-degree wash tip. Rinse off the soap. Move to the next panel. Foam it, go over with the wash mit, then rinse. Be sure NOT to use the wash mit on the wheels and tires.
You now have a clean vehicle. You may dry it if you wish, using soft microfiber towels.
The Detailing Secret Weapon–The Clay Bar
The next step is to remove the microscopic contaminants from the paint. Tree sap, bug guts, industrial fallout, brake dust and water spots to name a few. We use the Mother’s Gold Clay Bar Kit. You first spray the instant detailer on the paint. This acts as a lubricant. Now flatten the clay bar and lightly run it along the surface of the paint. If the clay bar is not gliding smoothly you have not applied enough detailing spray. Make a few passes until the surface feels smooth and defect-free. The surface should feel much smoother than the areas that have not been treated. Occasionally knead the clay bar back into a puck-shape and continue working the paint.
Like the washing regime, we concentrate on one side at a time. Once you have completed the clay bar process on a particular side, we use water in a spray bottle and a microfiber towel to remove the remove the excess detailing spray. The paint should feel noticeably smooth at this point. You may now move to the next side of the vehicle until the entire vehicle has had the clay bar treatment.
The Clay Bar Process is Important
You may be tempted to skip this step, but I assure you it’s the most critical. I damaged the black paint on my beautiful new Toyota pickup truck before I learned how to properly detail a vehicle. (I had to hire a detailer to come out and repair my errors.) If you skip the clay bar, as you go panel-to-panel applying wax, the contaminants in the paint collect in the pad. The contaminants then create scratches and swirls that look terrible and are time-consuming to remove. In summary, the clay bar is a critical step and should not be skipped.
Paint Correction
If your vehicle requires paint correction, now is the time. We often have brush scratches in our paint. We use Meguiar’s Cleaner/Polish for light scratch removal. For heavier scratches you might need a cutting compound. This step can be done by hand or using a machine polisher. We only perform this step on the localized scratches.
Final Step – Paint Sealant
With the paint washed and and a clay bar treatment, it is ready to receive wax or paint sealant. The purpose of wax is to make the paint shine and provide some level of paint protection. Paint sealant provides longer level of paint protection, and is what we use on our van. Based on the amazing reviews, we use a deep gloss paint sealant.
Paint sealant can be added by hand or using a random orbital buffer. Lately we’ve been doing it by hand, applying the sealant with a soft wax applicator that has been slightly wetted. Some say to apply the sealant in circular motions and others say to apply in straight lines. If you’ve done the clay bar process as described above, you don’t have to worry about introducing swirls into the paint. We use circular motions but choose whatever method makes you feel most comfortable. Most waxes and paint sealants recommend not applying them in direct sunlight. Wait for the wax/sealant to dry to a light haze, then remove with the microfiber towel.
If using a dual action polisher, you will also need a velcro backing pad as well as polishing and waxing pads. Always use very light pressure and work in an S-shaped motion. You can always apply by hand and remove by machine as well. Congratulations, you’re done!
A Few Final Tips
How often?
We do the routine described above ONCE A YEAR. Would it be better if it were done twice or more? Of course, but we don’t have that kind of time. We commit to doing this once a year around the April timeframe. Because it gets blistering hot where we live and we don’t have an enclosed shop, we much prefer to compete this task before the summer heat. You won’t be able to complete these tasks in direct sunlight on a hot day. The lubricant for the clay bar will dry the second it hits hot sheetmetal and the sealant will not apply correctly.
The other reason for targeting the April/May timeframe is to get the paint protected before summer. Our van sits outside in the sun, and we feel the paint protection is most needed during the summer when UV radiation is highest.
No Pressure Washer?
If you don’t have a pressure washer, use lots of soap and be careful with the pressure you apply to your wash mit. The pressure washer is really good at quickly removing grit from the paint surface to help prevent scratches and swirls in the paint.
Additional Paint Protection after Routine Washes
Finally, there’s one more product we use to try and prolong the paint protection. After washing the van we apply Meguiar’s Synthetic X-Press Spray Wax via a spray bottle. We do this BEFORE drying it, as the hydrophobic properties actually makes the water bead and run off the side of the vehicle. We DO NOT use this as part of the detail process described above–we ONLY do it during routine washes. This product prolongs the life of the paint sealant.
Help Us Help You
We offer all of our write-ups and instructional videos for free. A lot of time, effort and money goes into developing and maintaining this website. If you find the information on this website helpful, you may use our various links when you are ready to make purchases. As Amazon Associates we will make earnings from qualifying purchases, however it costs you nothing to use them. Alternatively you may consider using the donate button below to make a simple Paypal payment, or message us if you prefer Venmo. We sincerely appreciate your visit as well as your support.
Summary
Thanks for following along; we hope you found this helpful. This article was written after years of watching auto detailing channels as well as trial and error. While you can always do MORE to protect your vehicle, we feel this is the most reasonable approach you can take to protect your LARGE (pun intended) investment.

